6. Scripting via Virtual Private Servers
Background:
In our previous walkthroughs, we’ve focused on running scripts locally. However, what if we wanted to schedule scripts to run overnight, ensuring reports and data processing are complete first thing in the morning? What if we wanted to have a centralized repository of our scripts to avoid version control issues where different end-users have different script versions?
Our current solution of scheduling scripts via Windows Task Scheduler requires a dedicated, powered-on computer throughout the process. This setup poses challenges, as typical Windows consumer installations are often not configured for external access, complicating maintenance efforts. Moreover, concerns regarding power usage and uptime reliability arise, especially with increasing reporting requirements as businesses grow.
That is why in this walkthrough, we will be exploring virtual private servers.
Currently there are many solutions available on the market, from AWS EC2 to Azure Virtual Machines etc. However, these solutions are expensive and difficult to maintain, especially from our perspective as non-technical hobbyists. As a result, we will opt for a more developer-friendly solution, DigitalOcean, to setup a simple Linux virtual private server for overnight scripting.
Goal
Our current goal is to create a virtual private server in the form of DigitalOcean droplets that is capable of running scheduled scripts that can be used for daily snapshot reports (e.g. daily trial balances), or also handle end-user requests, such as generating a specific report when the end-user sends an email to a designated address etc.
Steps
Requirements: DigitalOcean monthly subscription (AUD $4 per month), database management client (e.g. DBeaver), Python, SQL, Linux command line basic knowledge.
First we need to register for a DigitalOcean account. Visit the link here. Note that this will incur minor costs, with a maximum of AUD $4 per month.
Once you have an account, create a project first, and then a droplet (virtual private server) via the following:
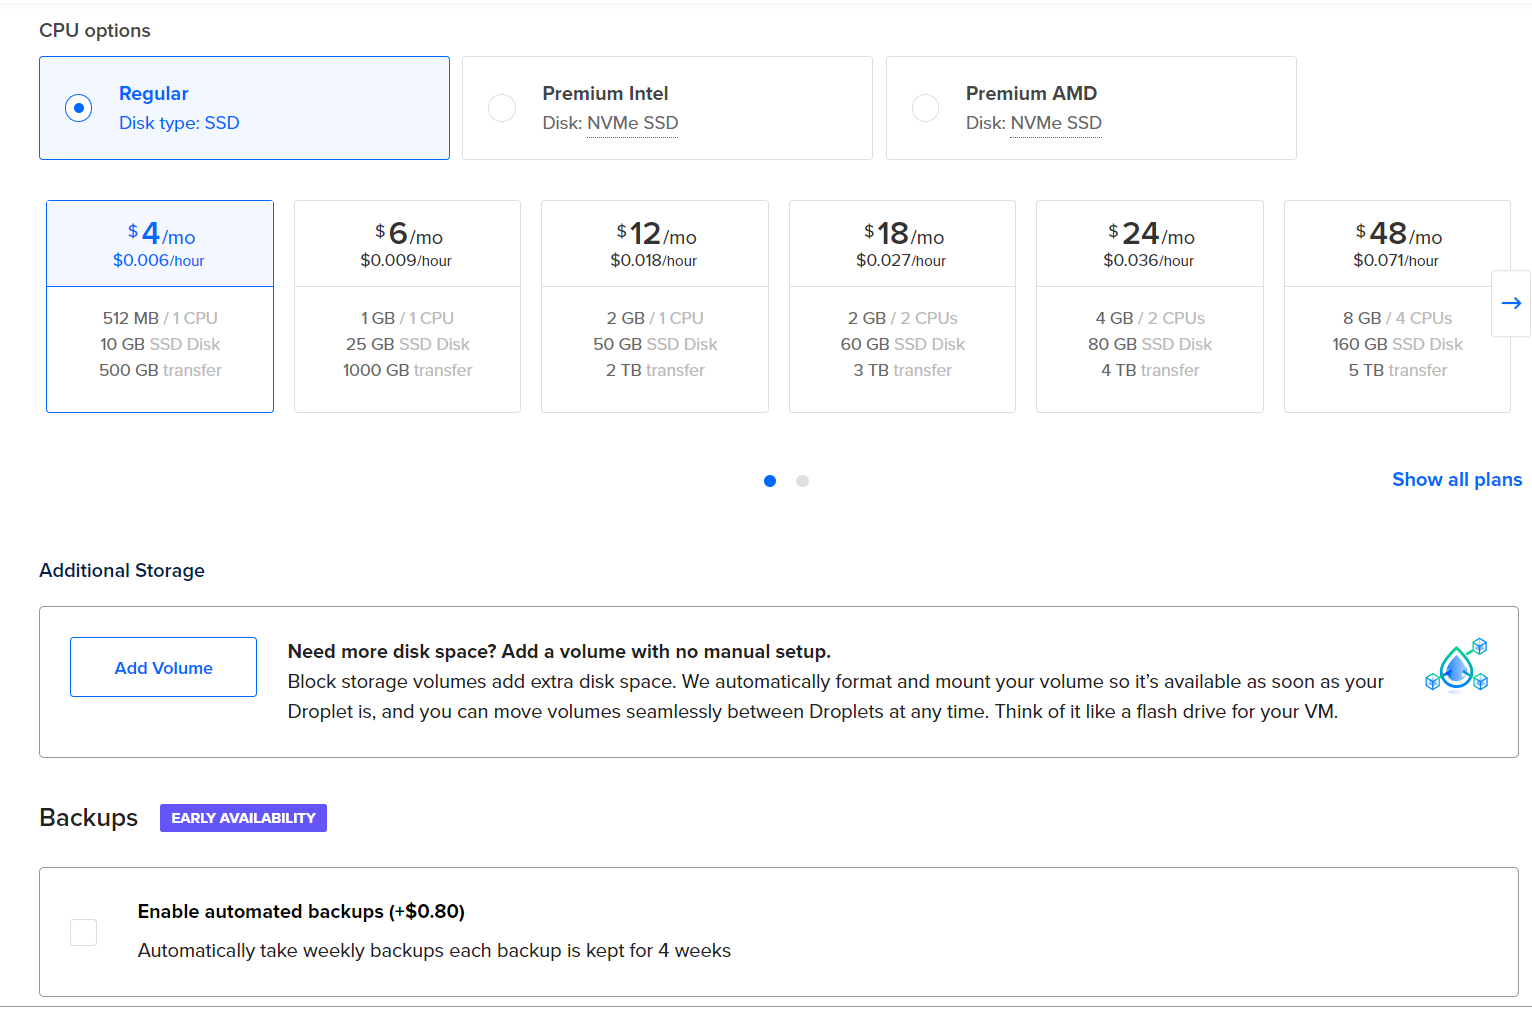
- Use Sydney as the server location, and Ubuntu Server as the OS. Choose the cheapest basic plan and CPU.
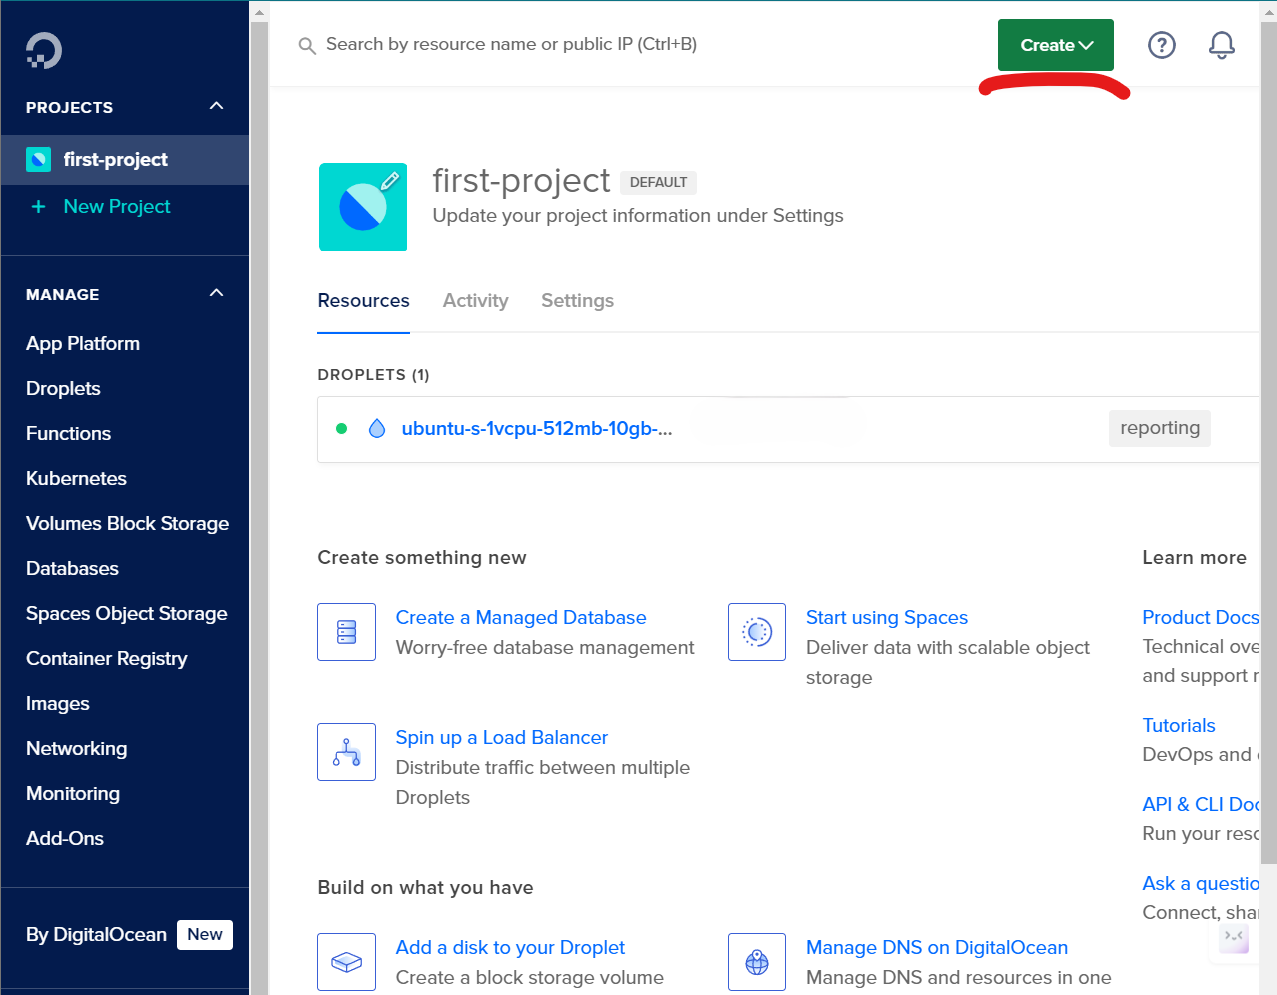 Create droplet
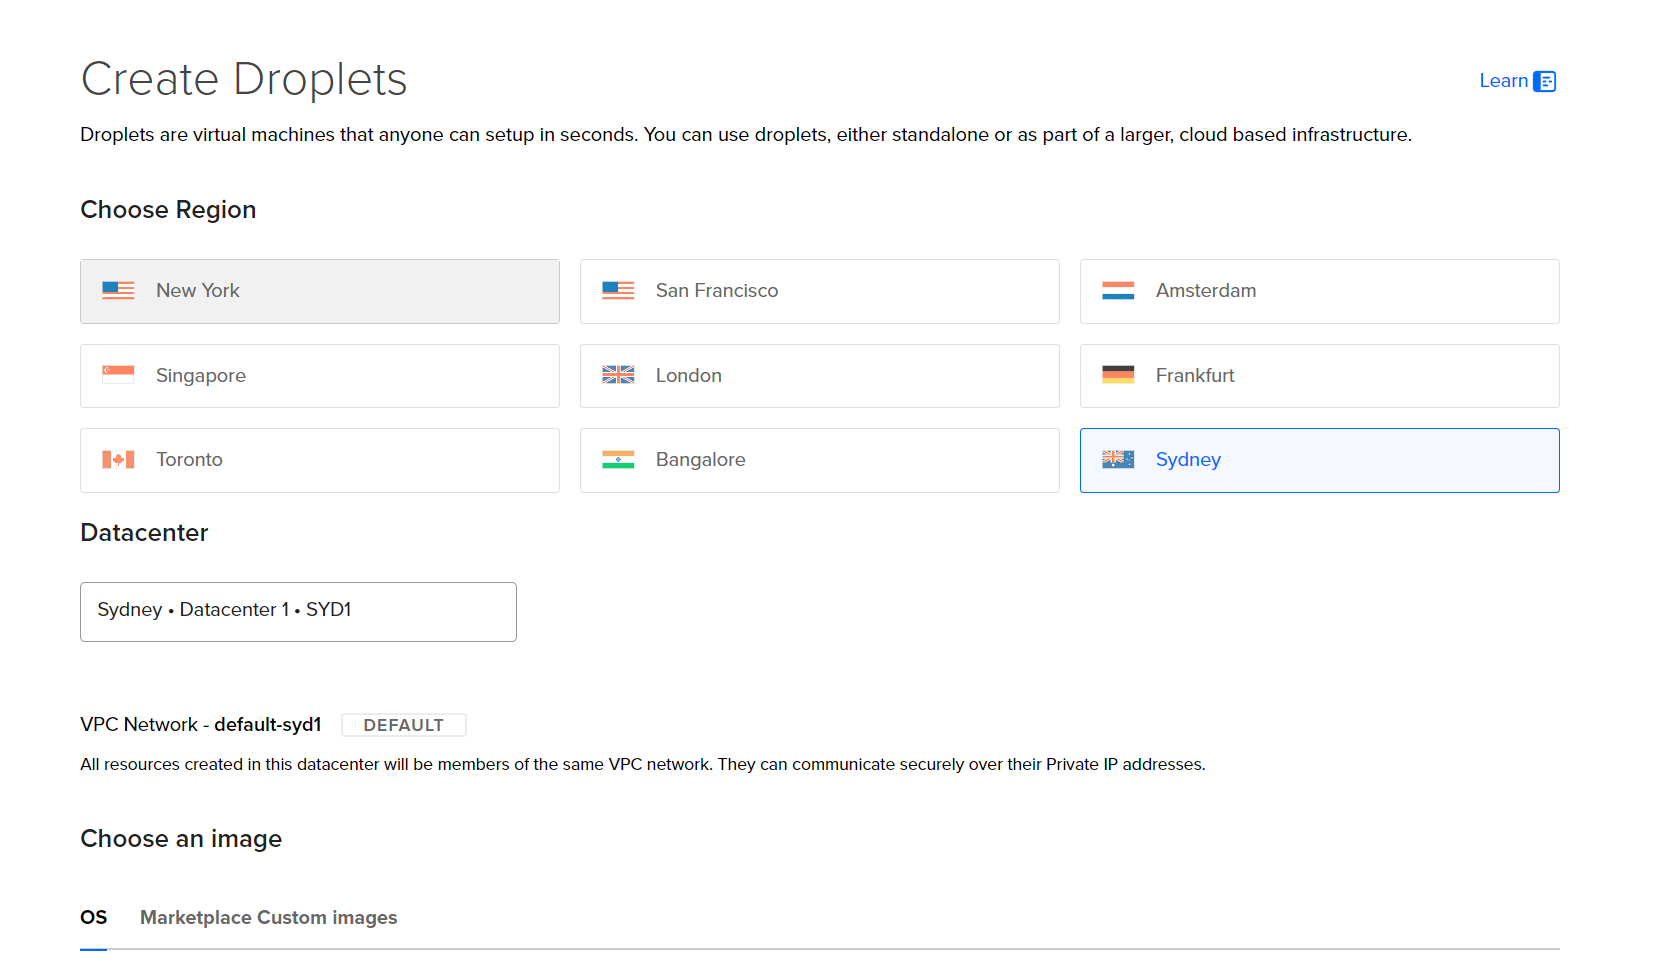 Select region
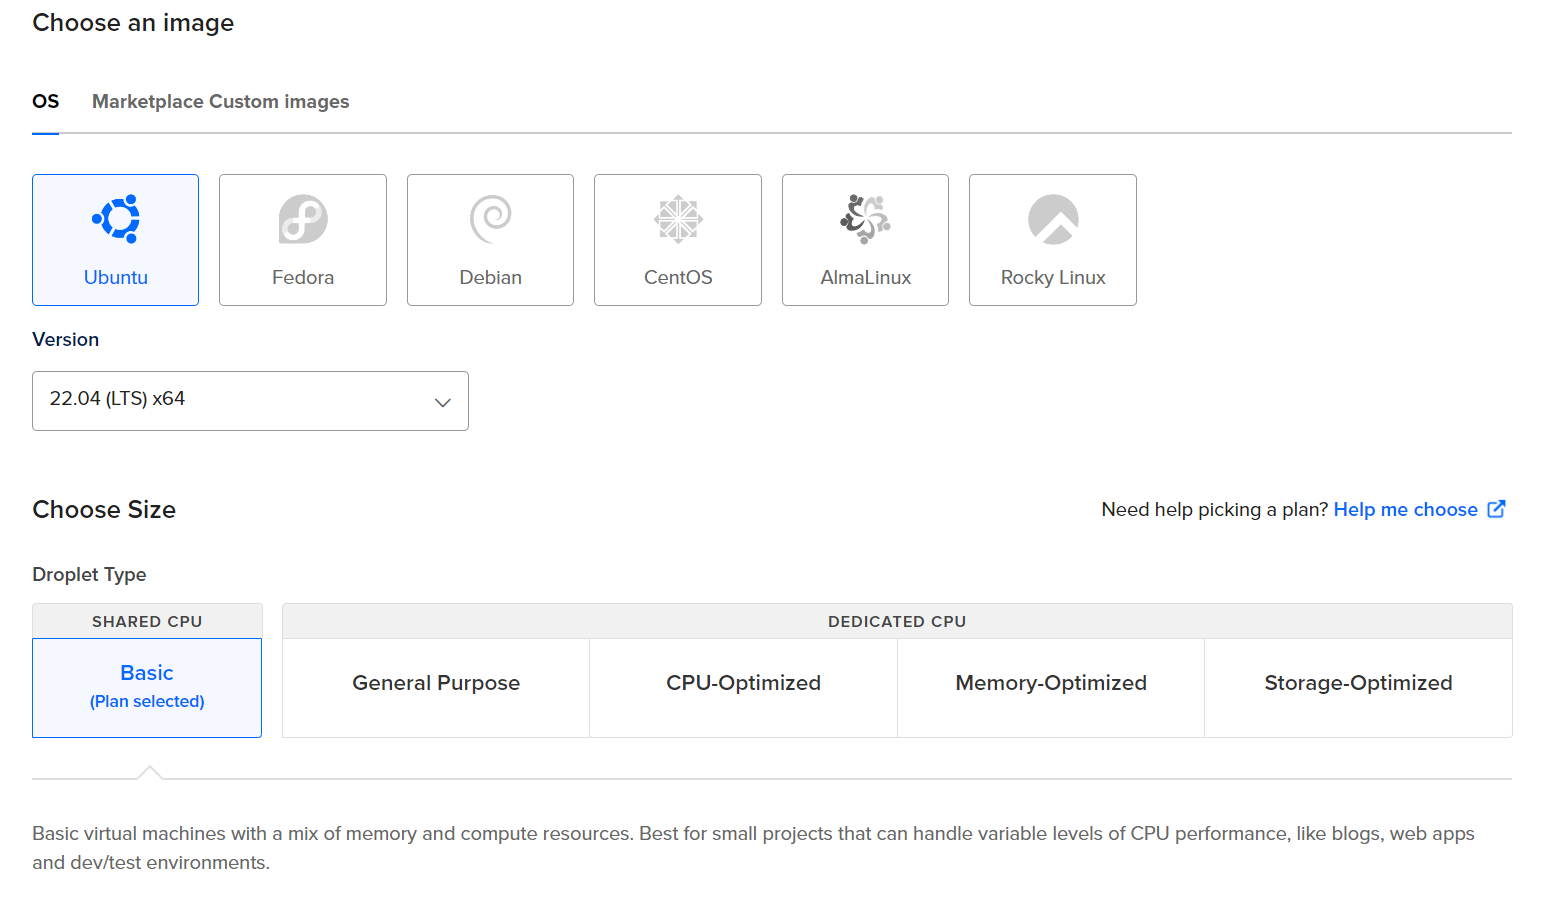 Select OS & plan
 Select CPU
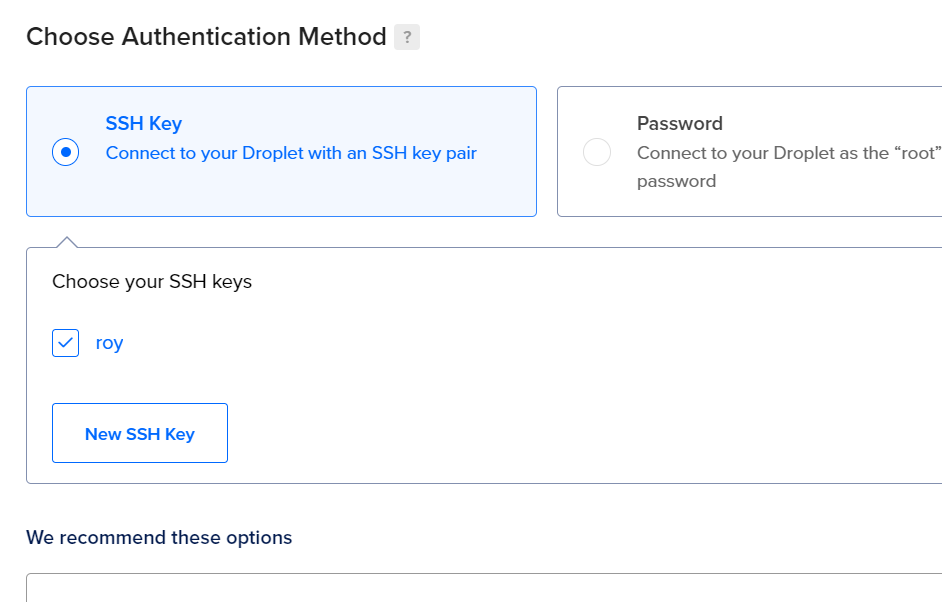
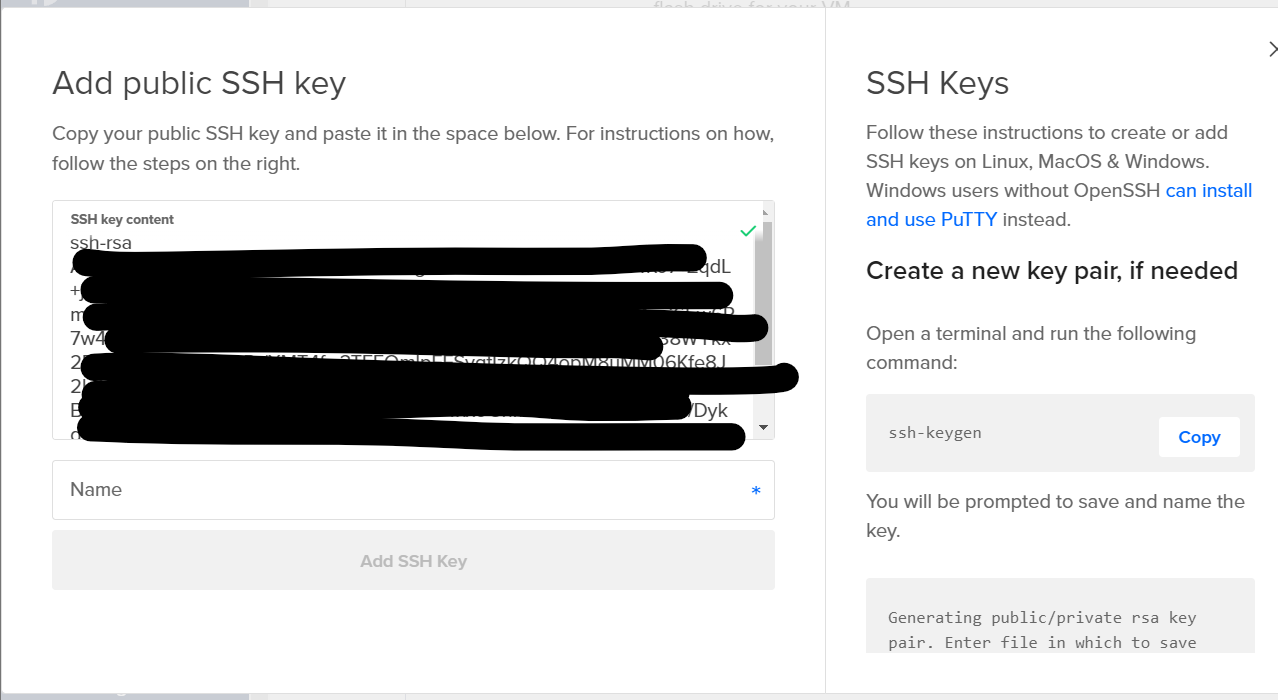
- To ensure secure access, you will need to create an SSH key. Click on the New SSH Key option and follow the guide on the popup window. This will involve Windows PowerShell.
 Create SSH key
 Create SSH key
 Finalization
- After initialization, you should have a droplet up and running with Ubuntu Server.
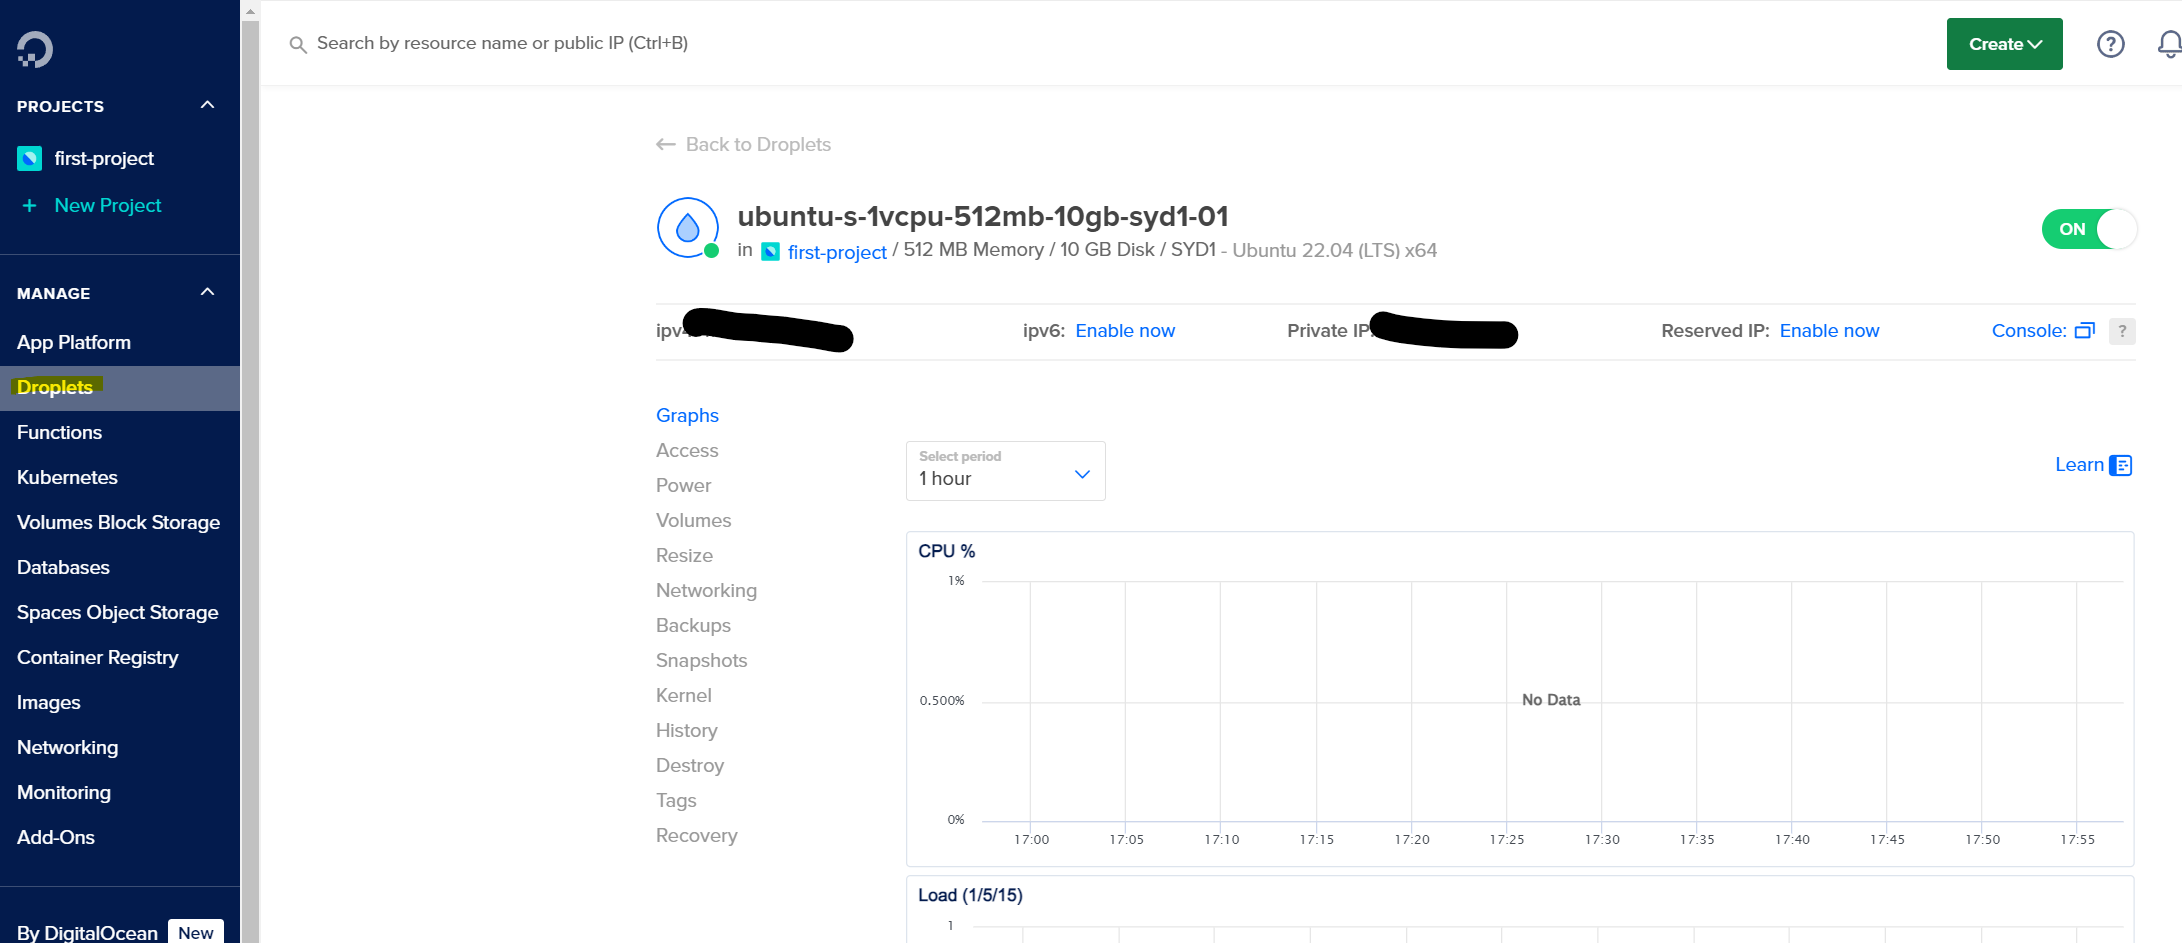 VPS created
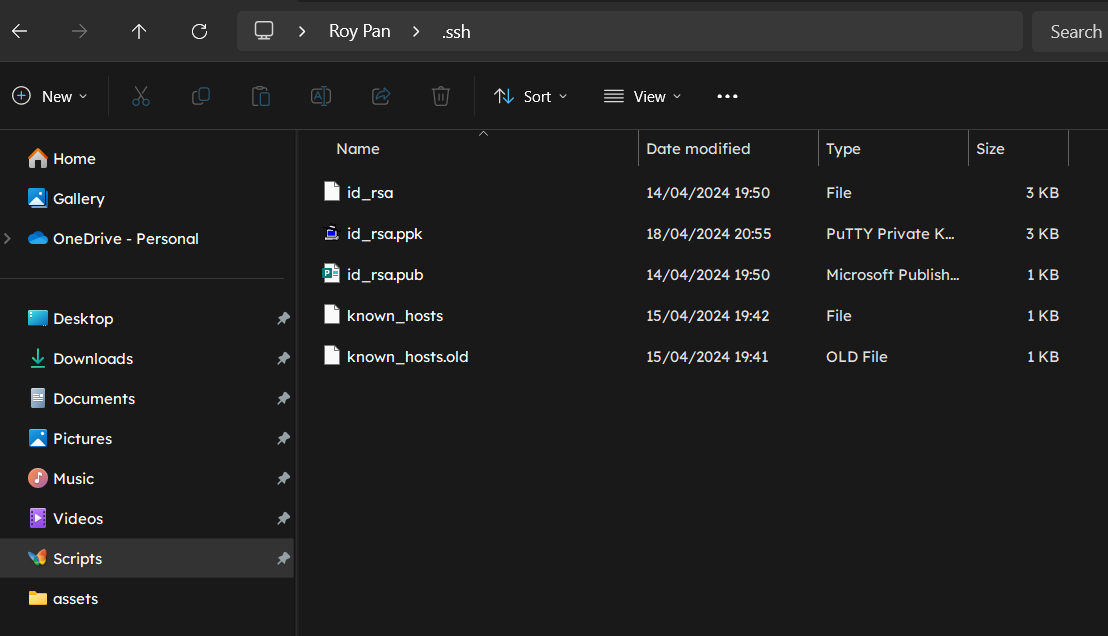
Open up File Explorer in Windows and go to your Users folder. You should notice a new .ssh folder. Open said folder and you should notice your new SSH key files there.
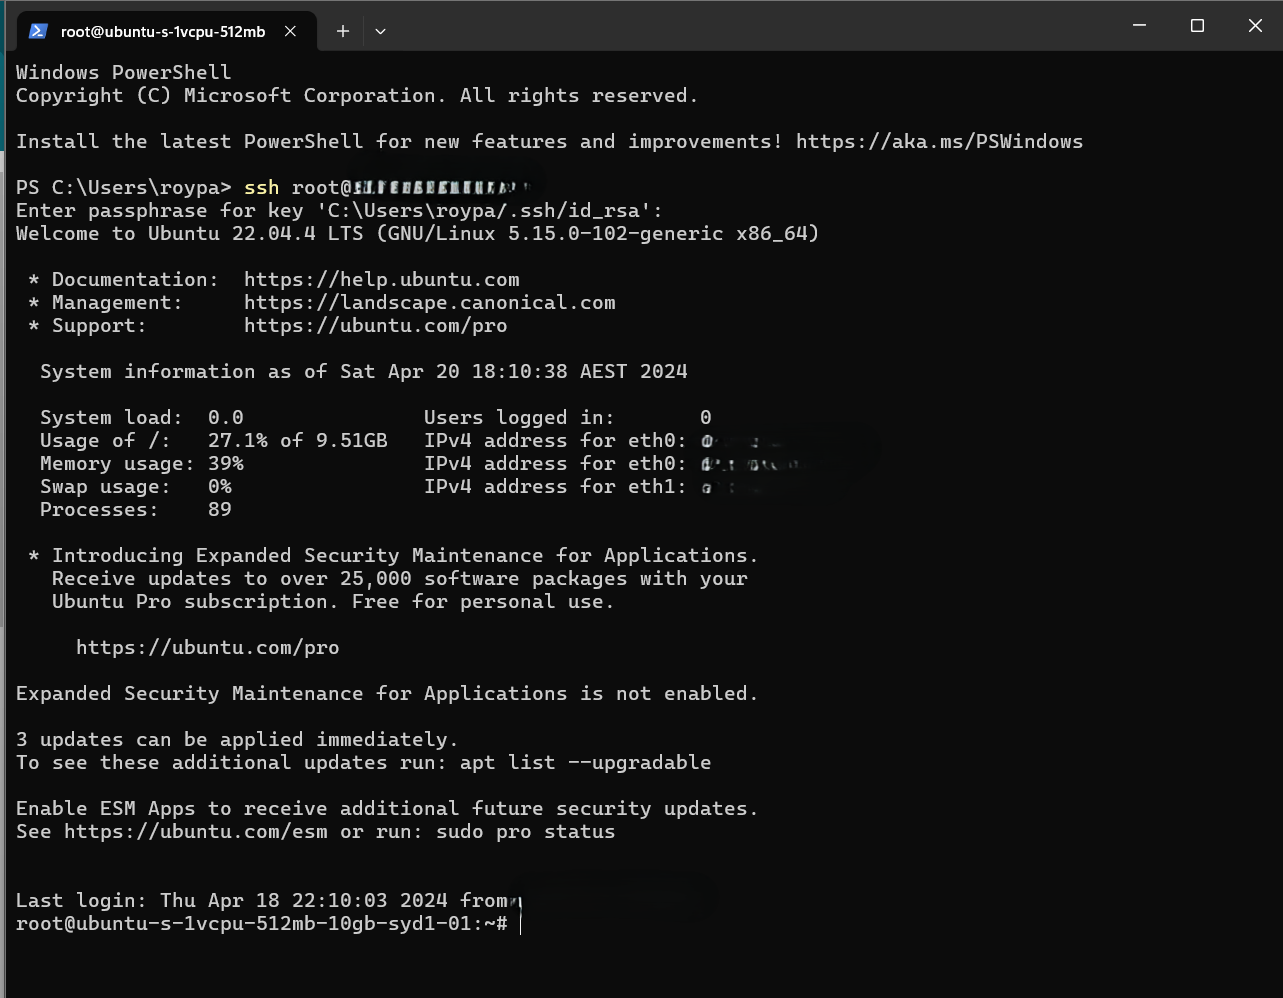
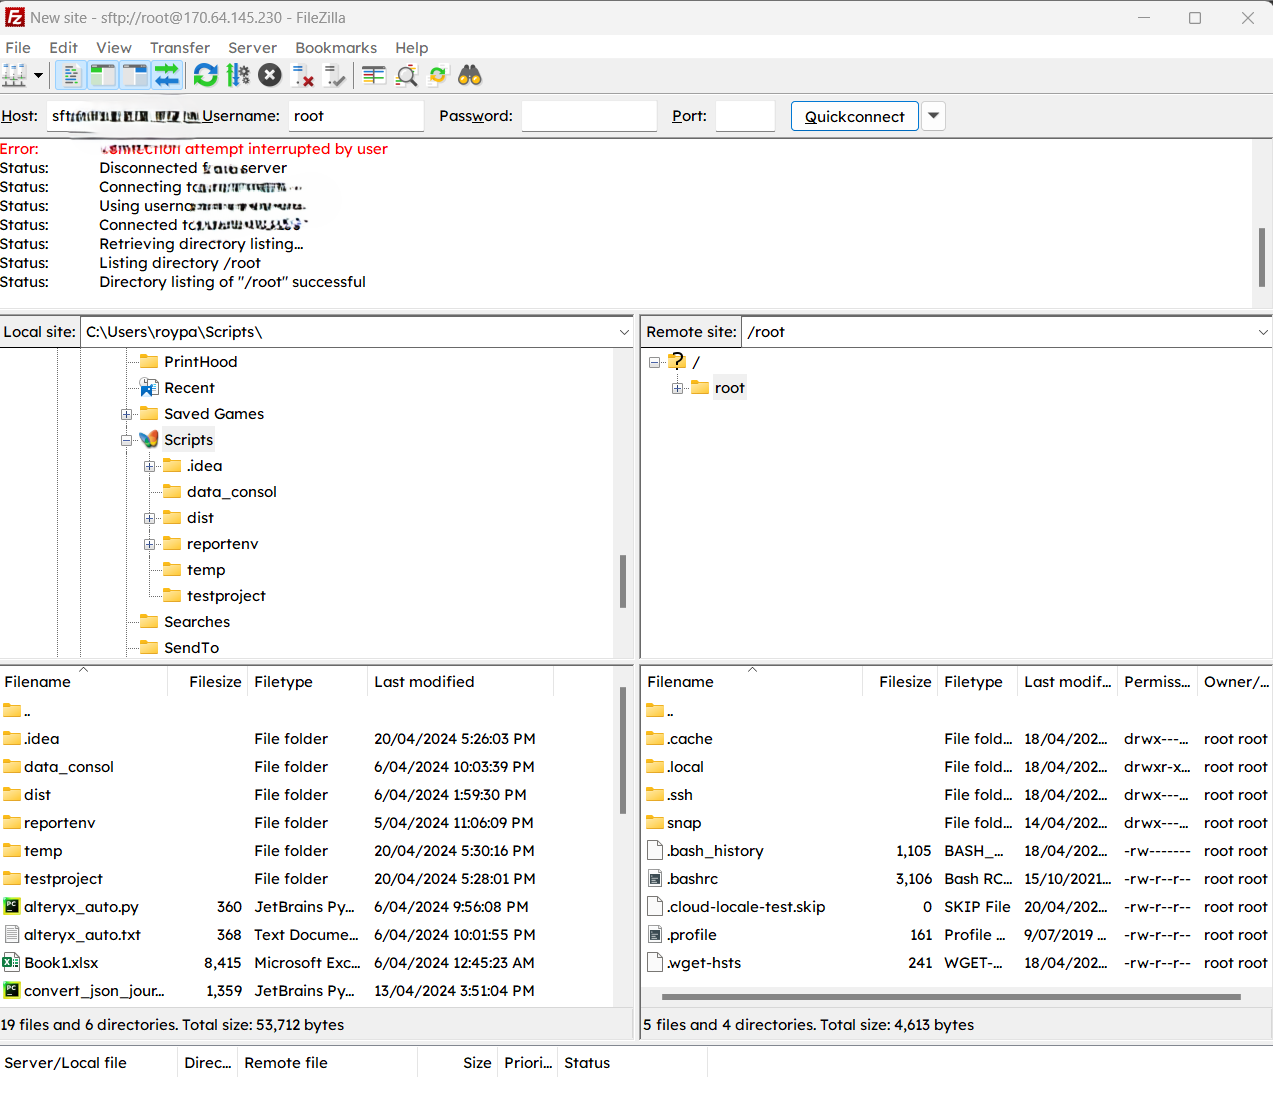
Refer to the this DigitalOcean guide on how to connect to your droplet. You should be able to connect to your droplet via a simple ssh root@{DROPLET_IP} command along with your passphrase (setup during SSH key generation) in PowerShell.
Once connected, your terminal should resemble the following:
 Ubuntu Server
Navigate to the Home folder within our Linux droplet with cd .. , then ls, and then cd home to move one folder up and then move to home. Your output should resemble the following:
1
2
3
4
5
6
root@ubuntu-s-1vcpu-512mb-10gb-syd1-01:/# cd ..
root@ubuntu-s-1vcpu-512mb-10gb-syd1-01:/# ls
bin   dev  home  lib32  libx32      media  opt   root  sbin  srv  tmp  var
boot  etc  lib   lib64  lost+found  mnt    proc  run   snap  sys  usr
root@ubuntu-s-1vcpu-512mb-10gb-syd1-01:/# cd home
root@ubuntu-s-1vcpu-512mb-10gb-syd1-01:/home#
Create a new scripts folder with the command mkdir scripts to hold our scripts and other files. Navigate to this folder using cd scripts afterwards.
Similar to what we did in our local development environment, we now need to create a virtual environment for dependency management. Ubuntu Server includes Python and pip by default so no additional installation is required. Enter python -m venv reportenv to create a virtual environment within our /home/scripts folder.
Once created, enter source reportenv/bin/activate to activate your virtual environment. Your command line should now have the reportenv prefix:
1
(reportenv) root@ubuntu-s-1vcpu-512mb-10gb-syd1-01:/home/scripts#
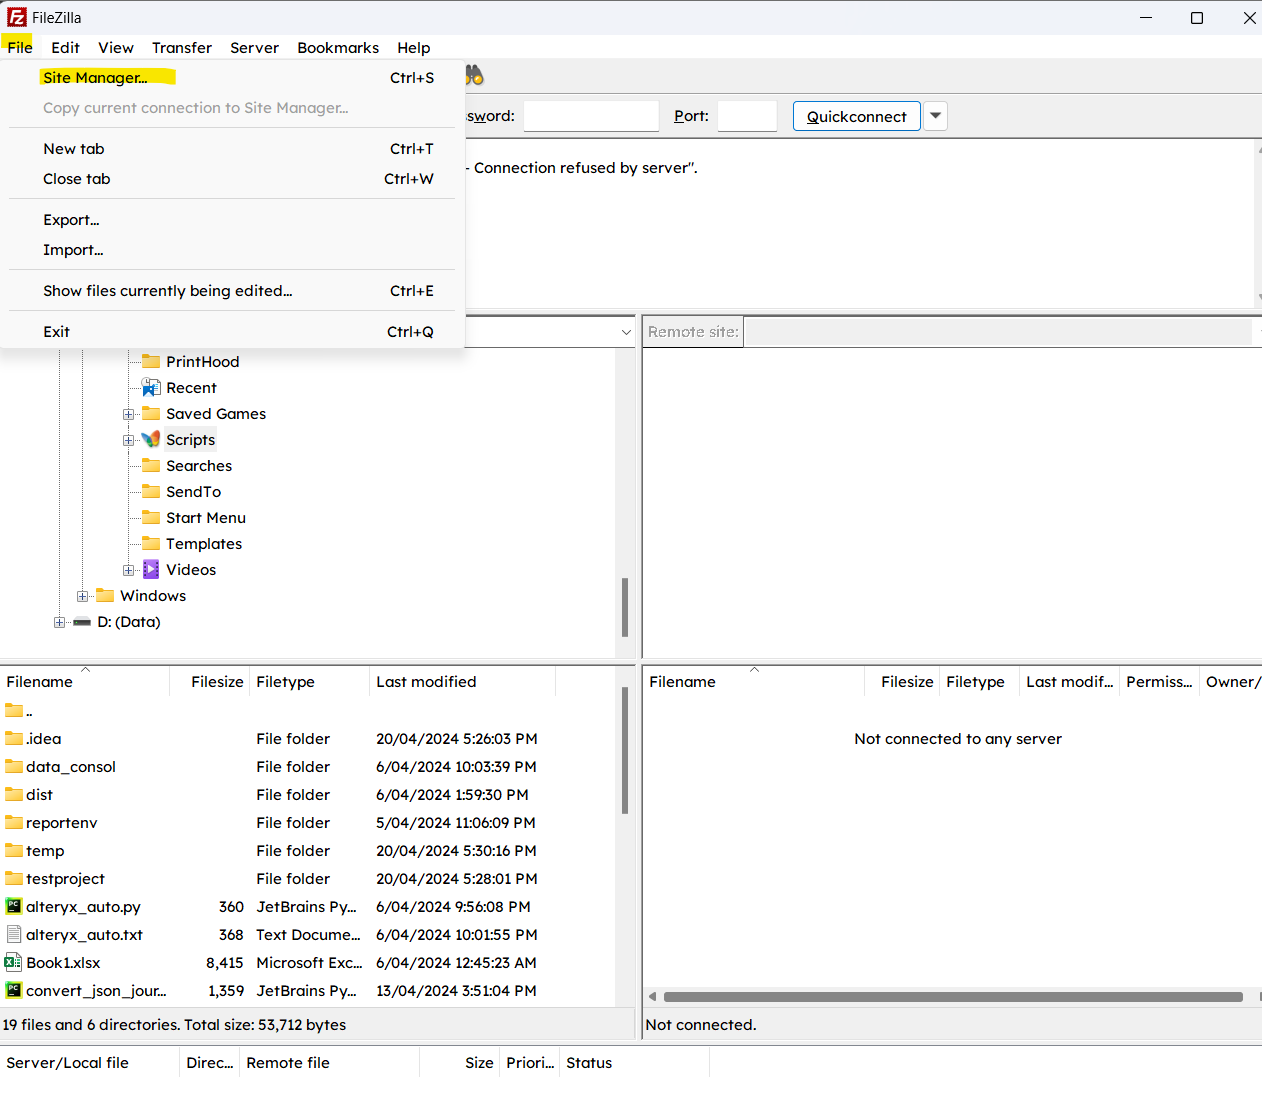
We now need to find a way to transfer our scripts to our server. We will require FileZilla for this. Refer to the guide linked for details. Essentially you need to download and install the FileZilla client on your local computer and then setup the connection via the configurations menu. Refer images below:
 Site Manager
 Refer DO guide for parameters
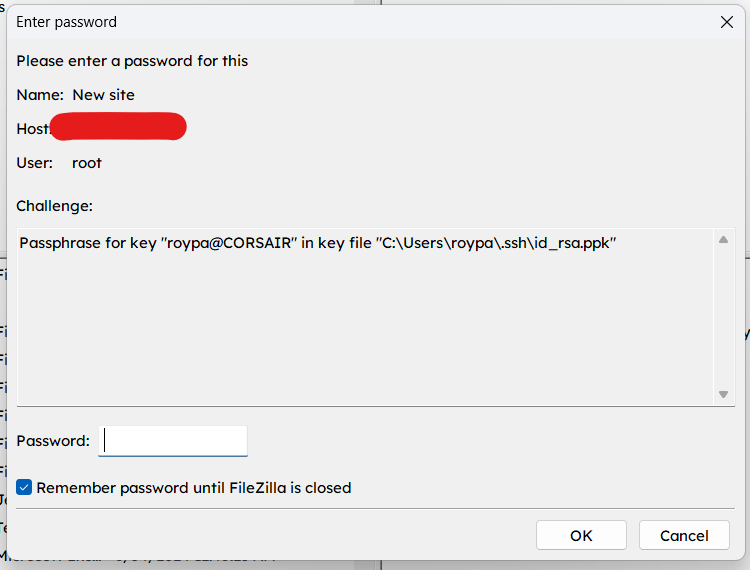
Note that FileZilla may create a new id_rsa.ppk file for you. You may need to navigate to the Users > .ssh folder mentioned earlier.
FileZilla will also require you to provide your passphrase (setup during SSH key generation) to connect.
 SSH key passphrase
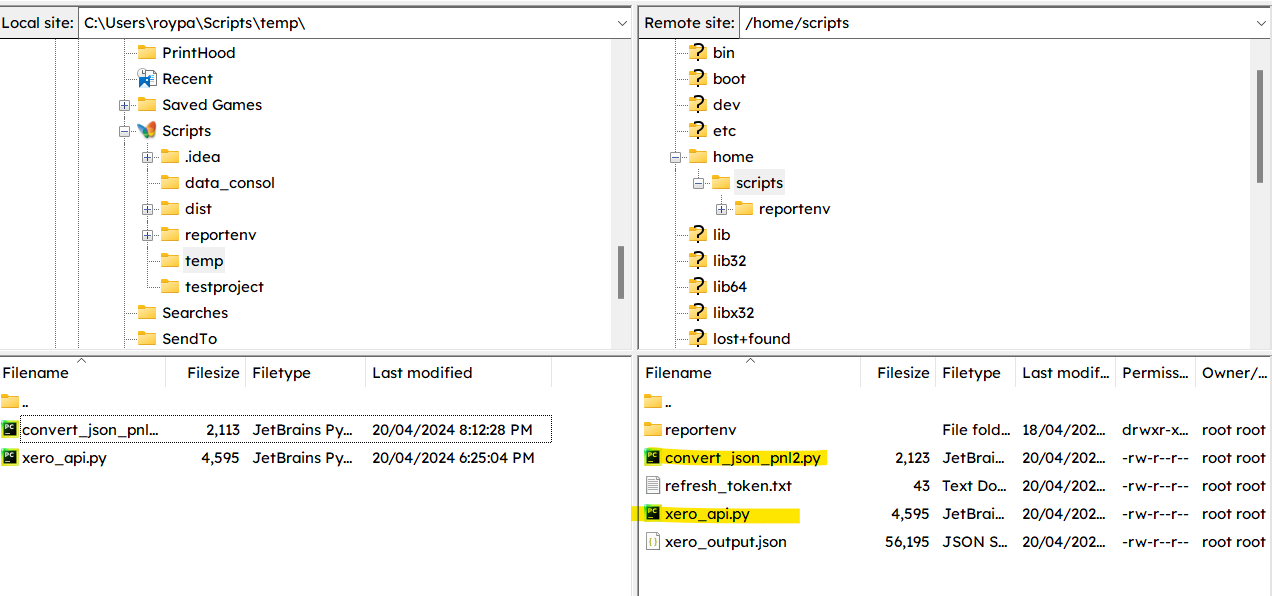
You should now be able to browse the file structure on both your local computer and your DigitalOcean droplet/VPS. Use this to drag and drop relevant scripts from our local folders to the /home/scripts folder in our server.
 Files
Files
In this example, convert_json_pnl.py and xero_api.py from our prior walkthroughs have been uploaded to /home/scripts. These contain scripts for Xero Trial Balance generation and JSON to CSV conversion. Note that you will also need to port over the refresh_token.txt file used in our authorization process, as Ubuntu Server does not support GUI web browsing. As a result you will need to authenticate the script on your local computer instead. The Trial Balance script has been modified to add columns regarding report sections (e.g. Revenue or Assets) and report dates. File path references have also been changed to /home/scripts. The script is set to extract the trial balance as at the day before and upload it to the Xata database previously created, with the script to run on a daily basis - we shall schedule this shortly.
Please also ensure your Xata database table contains the relevant columns to match our script, namely report_type, acct_desc, debits, credits, report_date, created_at. Refer scripts below for details.
Xero Trial Balance:
Click here to expand
import requests
import webbrowser
import base64
from datetime import date, timedelta

client_id = ''
client_secret = ''
redirect_url = 'https://xero.com/'
scope = 'offline_access accounting.reports.read'
# scope = 'offline_access accounting.journals.read'
b64_id_secret = base64.b64encode(bytes(client_id + ':' + client_secret, 'utf-8')).decode('utf-8')


def XeroFirstAuth():
    # 1. Send a user to authorize your app
    auth_url = ('''https://login.xero.com/identity/connect/authorize?''' +
                '''response_type=code''' +
                '''&client_id=''' + client_id +
                '''&redirect_uri=''' + redirect_url +
                '''&scope=''' + scope +
                '''&state=123''')
    webbrowser.open_new(auth_url)

    # 2. Users are redirected back to you with a code
    auth_res_url = input('What is the response URL? ')
    start_number = auth_res_url.find('code=') + len('code=')
    end_number = auth_res_url.find('&scope')
    auth_code = auth_res_url[start_number:end_number]
    print(auth_code)
    print('\n')

    # 3. Exchange the code
    exchange_code_url = 'https://identity.xero.com/connect/token'
    response = requests.post(exchange_code_url,
                            headers = {
                                'Authorization': 'Basic ' + b64_id_secret
                            },
                            data = {
                                'grant_type': 'authorization_code',
                                'code': auth_code,
                                'redirect_uri': redirect_url
                            })
    json_response = response.json()
    print(json_response)
    print('\n')

    # 4. Receive your tokens
    return [json_response['access_token'], json_response['refresh_token']]


# 5. Check the full set of tenants you've been authorized to access
def XeroTenants(access_token):
    connections_url = 'https://api.xero.com/connections'
    response = requests.get(connections_url,
                            headers={
                                'Authorization': 'Bearer ' + access_token,
                                'Content-Type': 'application/json'
                            })
    json_response = response.json()
    print(json_response)

    for tenants in json_response:
        json_dict = tenants
    return json_dict['tenantId']


# 6.1 Refreshing access tokens
def XeroRefreshToken(refresh_token):
    token_refresh_url = 'https://identity.xero.com/connect/token'
    response = requests.post(token_refresh_url,
                             headers={
                                 'Authorization': 'Basic ' + b64_id_secret,
                                 'Content-Type': 'application/x-www-form-urlencoded'
                             },
                             data={
                                 'grant_type': 'refresh_token',
                                 'refresh_token': refresh_token
                             })
    json_response = response.json()
    print(json_response)

    new_refresh_token = json_response['refresh_token']
    rt_file = open('/home/scripts/refresh_token.txt', 'w')
    rt_file.write(new_refresh_token)
    rt_file.close()

    return [json_response['access_token'], json_response['refresh_token']]


# 6.2 Call the API
def XeroRequests():
    old_refresh_token = open('/home/scripts/refresh_token.txt', 'r').read()
    new_tokens = XeroRefreshToken(old_refresh_token)
    xero_tenant_id = XeroTenants(new_tokens[0])
    report_date = date.today() - timedelta(days=1)
    get_url = f'https://api.xero.com/api.xro/2.0/Reports/TrialBalance?Date={report_date}'
    # get_url = 'https://api.xero.com/api.xro/2.0/Journals'
    response = requests.get(get_url,
                            # params={
                            #     "offset": "481"
                            # },
                            headers={
                                'Authorization': 'Bearer ' + new_tokens[0],
                                'Xero-tenant-id': xero_tenant_id,
                                'Accept': 'application/json'
                            })
    json_response = response.json()
    print(json_response)

    xero_output = open('/home/scripts/xero_output.json', 'w')
    xero_output.write(response.text)
    xero_output.close()


# old_tokens = XeroFirstAuth()
# XeroRefreshToken(old_tokens[1])


XeroRequests()
JSON conversion:
Click here to expand
import json
import psycopg2
import pytz
from datetime import datetime, date, timedelta

# Replace <YOUR_API_KEY> with your actual API key
api_key = ""

# Construct the connection string
conn_string = f"postgresql://{username}:{api_key}@us-east-1.sql.xata.sh/postgres:main?sslmode=require"

# Define your SQL query for insertion
query = ("""
INSERT INTO test1 (report_type, acct_desc, debits, credits, report_date, created_at)
VALUES (%s, %s, %s, %s, %s, %s);
""")

# Load the JSON data
with open('/home/scripts/xero_output.json') as f:
    data = json.load(f)

# Connect to the database
conn = psycopg2.connect(conn_string)
conn.autocommit = True  # Enable autocommit for the connection
# Create a cursor
cur = conn.cursor()

# Initialize an empty list to store all rows
all_rows = []

# Iterate over each report
for report in data['Reports']:
    # Iterate over each section in the report
    for section in report['Rows']:
        if 'Title' in section:
            report_type = section['Title']
        else:
            report_type = None
        # Check if the section has rows
        if 'Rows' in section:
            # Iterate over each row in the section
            for row in section['Rows']:
                # Append the row to the list
                all_rows.append((report_type, row))

timezone = pytz.timezone("UTC")  # Replace "Your/Timezone" with appropriate one, like "Asia/Tokyo"
now_in_timezone = datetime.now(timezone)
print(now_in_timezone.strftime('%Y-%m-%d %H:%M:%S'))

# Write rows
for report_type, row in all_rows:
    if 'Cells' in row:
        # Extract values for columns 1, 4, and 5 (0-based indexing)
        row_values = [
            report_type,
            row['Cells'][0].get('Value', ''),
            row['Cells'][3].get('Value', '') or 0,
            row['Cells'][4].get('Value', '') or 0,
            date.today() - timedelta(days=1),
            now_in_timezone.strftime('%Y-%m-%d %H:%M:%S')
        ]
        cur.execute(query, row_values)

conn.commit()
cur.close()
conn.close()
Navigate back to your PowerShell terminal to access the Ubuntu Server VPS and install the relevant database dependencies used in our scripts via pip install psycopg2-binary.
Navigate to the /home/scripts folder and then enter python xero_api.py followed by python convert_json_pnl2.py. Note that you may have different file names.
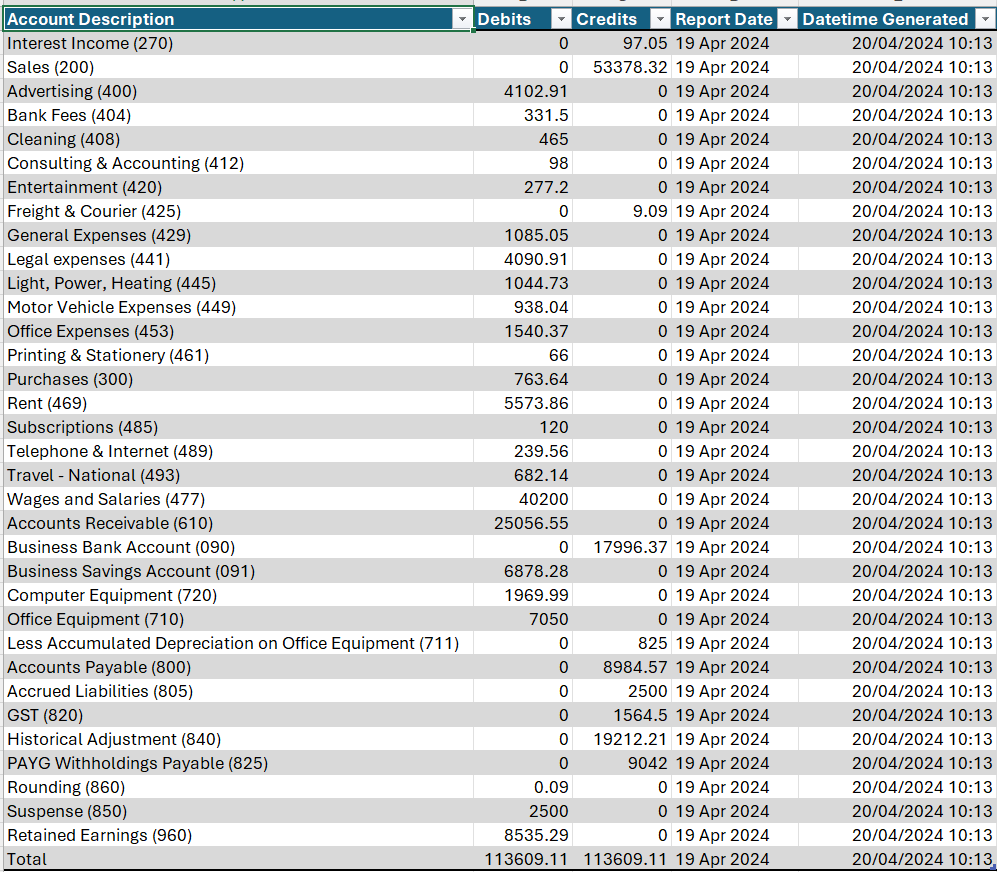
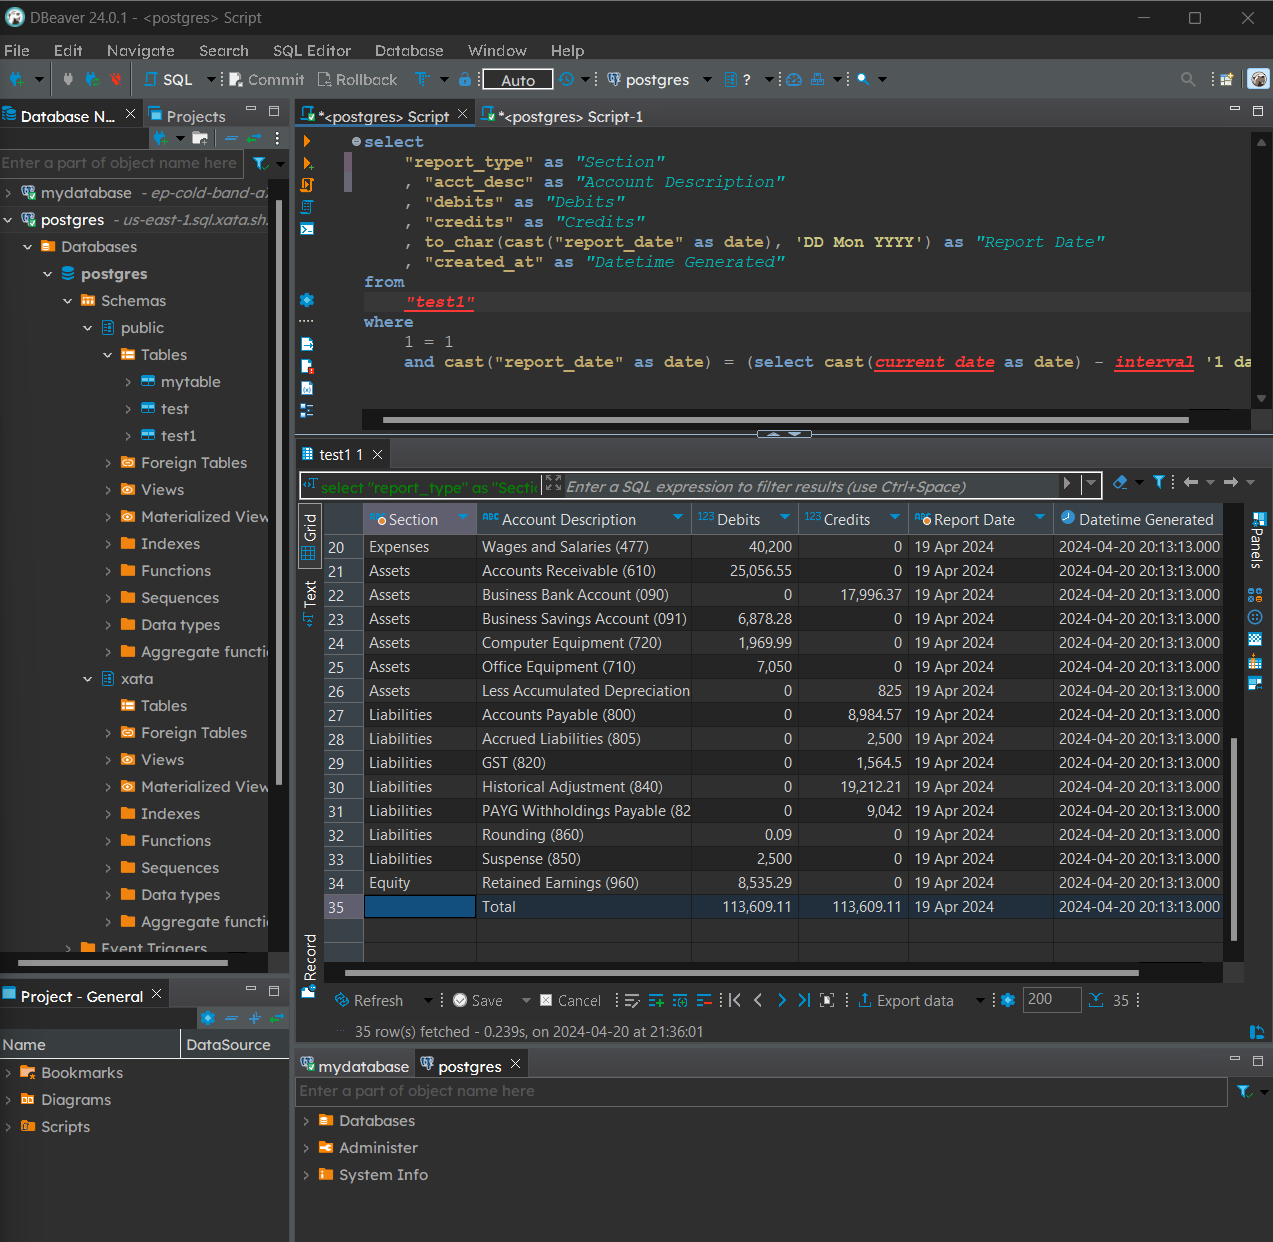
Now if you open DBeaver and query from the database after running both scripts in our server, you will notice that our tables have been now been populated with trial balance data as at the day before.
PostgreSQL query:
1
2
3
4
5
6
7
8
9
10
11
12
select
	"report_type" as "Section"
	, "acct_desc" as "Account Description"
	, "debits" as "Debits"
	, "credits" as "Credits"
	, to_char(cast("report_date" as date), 'DD Mon YYYY') as "Report Date"
	, "created_at" as "Datetime Generated"
from
	"test1"
where
	1 = 1
	and cast("report_date" as date) = (select cast(current_date as date) - interval '1 day');
Output:
We will now schedule both scripts to run at 2:00 AM sequentially. Please refer online documentation for guides on how to set local timezones for Ubuntu.
We will first need to create a bash script to activate our Linux reportenv virtual environment prior to running Python scripts, otherwise required dependencies will not be available.
1
2
3
4
5
6
7
source /home/scripts/reportenv/bin/activate

/home/scripts/reportenv/bin/python /home/scripts/xero_api.py

/home/scripts/reportenv/bin/python /home/scripts/convert_json_pnl2.py

deactivate
Upload the .sh file into the /home/scripts folder via FileZilla as mentioned above.
Once imported, enter crontab -e in your Linux terminal to open the cron table (essentially a scheduled items list). Add an additional 0 2 * * * /home/scripts/schedule.sh line to the end of the table:
1
2
3
4
5
6
7
8
9
10
11
12
13
14
15
16
17
18
19
20
21
22
23
24
25
  GNU nano 6.2                          /tmp/crontab.7bSFF3/crontab                                    # Edit this file to introduce tasks to be run by cron.
#
# Each task to run has to be defined through a single line
# indicating with different fields when the task will be run
# and what command to run for the task
#
# To define the time you can provide concrete values for
# minute (m), hour (h), day of month (dom), month (mon),
# and day of week (dow) or use '*' in these fields (for 'any').
#
# Notice that tasks will be started based on the cron's system
# daemon's notion of time and timezones.
#
# Output of the crontab jobs (including errors) is sent through
# email to the user the crontab file belongs to (unless redirected).
#
# For example, you can run a backup of all your user accounts
# at 5 a.m every week with:
# 0 5 * * 1 tar -zcf /var/backups/home.tgz /home/
#
# For more information see the manual pages of crontab(5) and cron(8)
0 2 * * * /home/scripts/schedule.sh
                                           [ Read 23 lines ]
^G Help       ^O Write Out  ^W Where Is   ^K Cut        ^T Execute    ^C Location   M-U Undo
^X Exit       ^R Read File  ^\ Replace    ^U Paste      ^J Justify    ^/ Go To Line M-E Redo
This will schedule the two mentioned scripts to run at the times specified on a daily basis.
Outcome:
We should now expect daily snapshots to show up on our database. Data obtained this way could be used for further analysis and reporting. Should you be interested in setting up automated emails or custom reporting, these are all possible via further scripting. We shall explore some of these options in future tutorials.