1. Automated Data Retrieval via Xero APIs
Background:
Accountants typically gather data manually, such as transaction lists or trial balances, to conduct analysis. This information is subsequently utilized for computations and the generation of reports, or for updating the accounting system through journal entries. In cases where multiple systems are involved, accountants may require additional time to extract data, particularly if there are no customized integrations or connections between the systems.
For example, if we have a report that uses data from an Excel table, how could we set it up so the table automatically gets data from the accounting system?
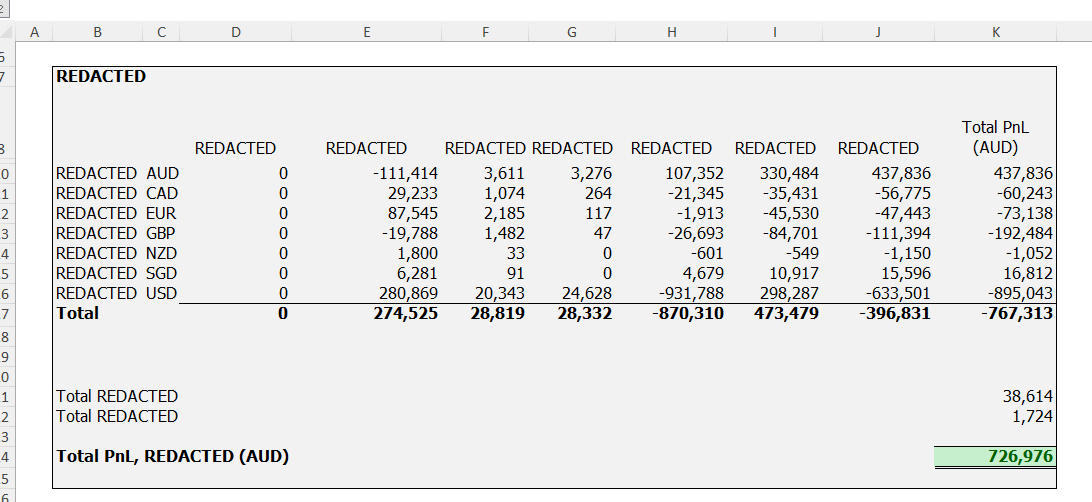 Simplified report example
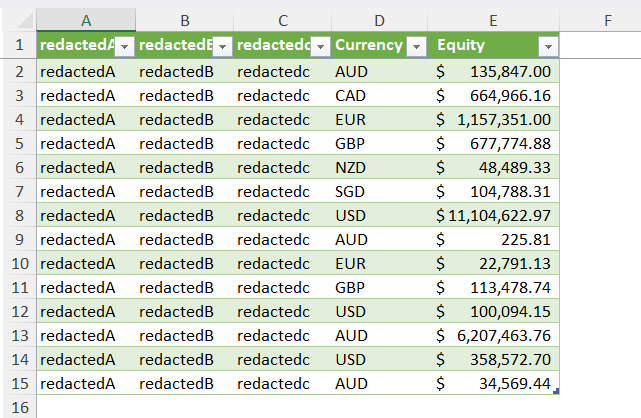 Simplified data example
Automated reporting and analytics hinge on the availability of input data. Without sufficient data, models cannot function optimally. Therefore, the primary step in establishing our analytics system would entail automating the extraction of data. Typically, accounting applications extract data via API calls, yielding JSON data. This JSON dataset would serve as the cornerstone for our analysis.
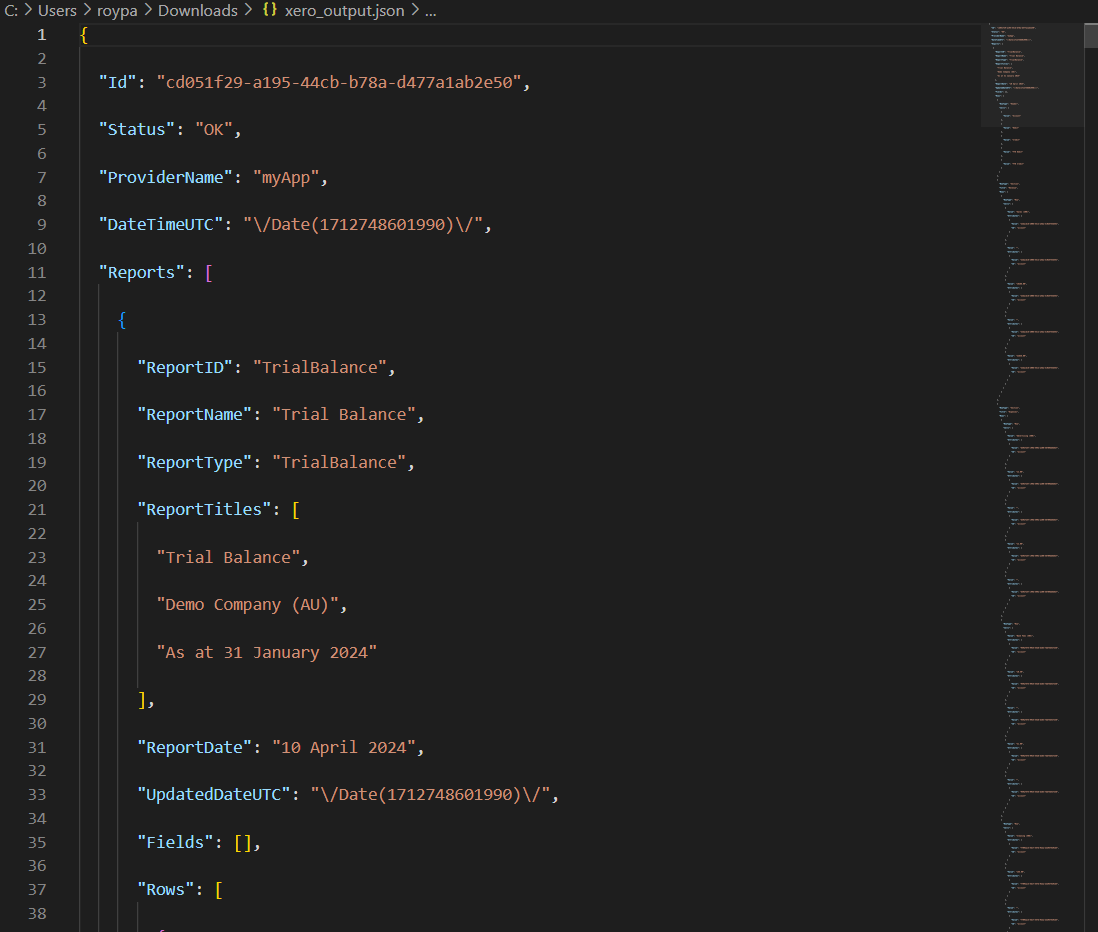 JSON example
Goal
Our current objective is to develop a Python script that automates the extraction of financial data from an accounting system and establishes the necessary authentication procedures.
For demonstration purposes, we’ll use Xero, a popular cloud-based accounting software solution, due to its well-documented API. It’s worth noting that with the appropriate API access configuration, the approach outlined here could be adapted to other accounting environments, provided that documentation and IT support are available.
Visit the Xero Main and Xero API pages here.
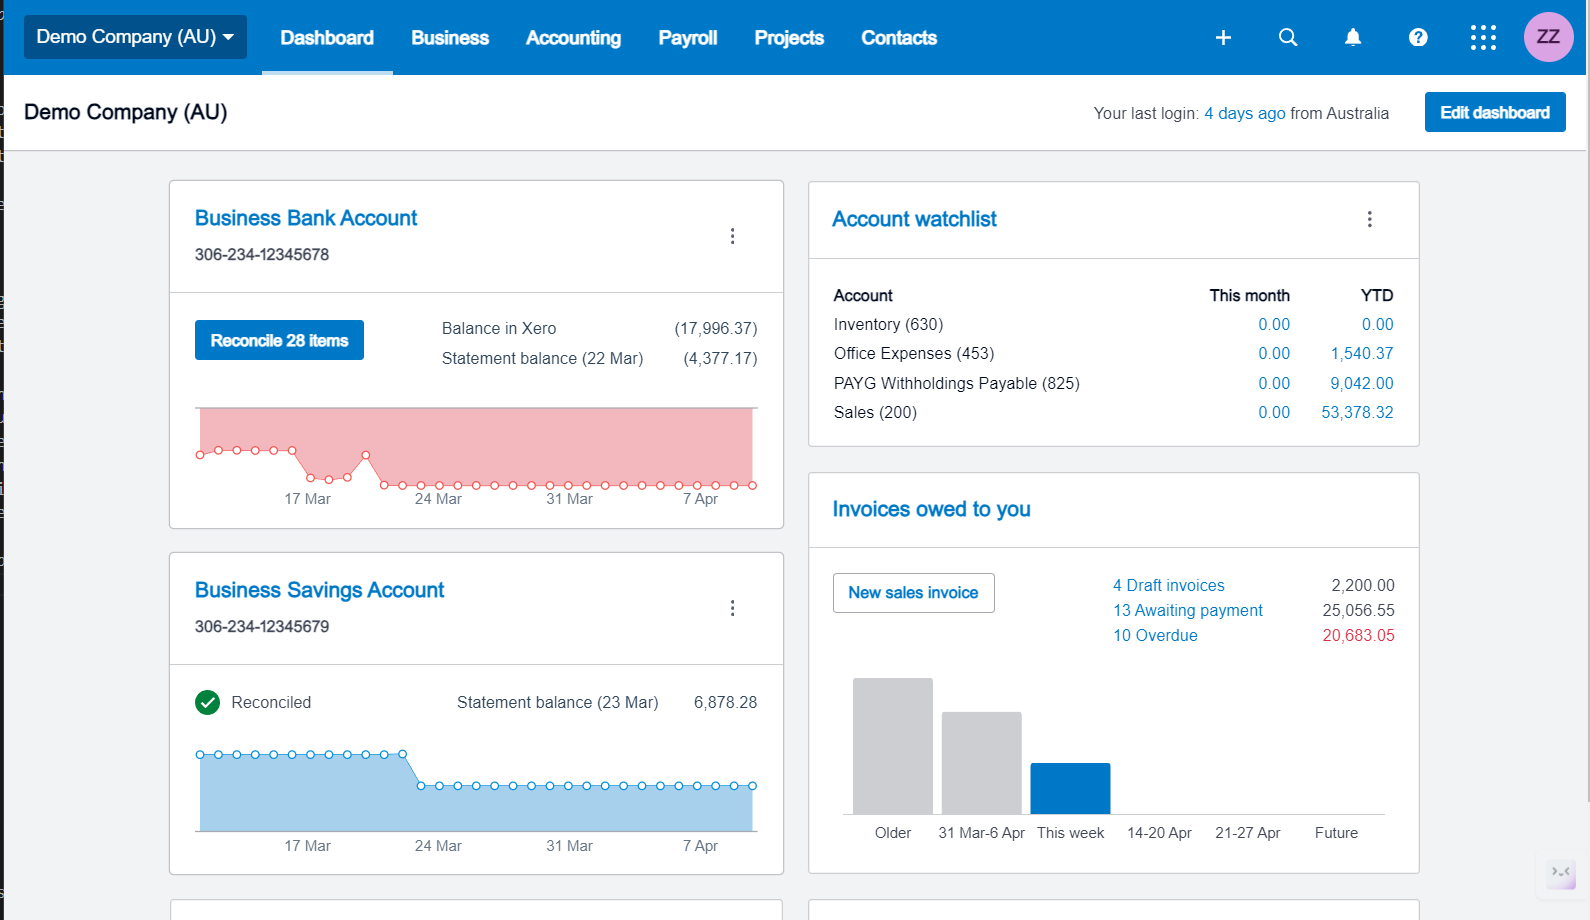 Xero sample company
Steps
Requirements: existing Xero account, Python.
Assuming you have registered a Xero account, either with the default demo company or an actual company, our first step is to create a long-term connection between our local computer and Xero.
Click here should you be interested in a detailed video tutorial (Source: Edgecate).
For a simplified walkthrough, please refer the following instructions.
To set up your Python environment, ensure Python is installed. Then, you will need to install the necessary package dependencies for the script to function. It’s advisable to create a virtual environment for better dependency management.
To create a virtual environment, open a PowerShell terminal and use the cd command to navigate to the directory where you want to set up your scripts. For example:
1
cd C:\Users\roypa\Scripts
Use the following command to create a virtual environment. This will prevent conflicts if you decide to work on other Python projects. Omit the quotation marks:
1
python -m venv "INSERT_NAME_HERE"
You can then activate the virtual environment via the activate file within the newly created environment folder. Replace the example path below with yours and press Enter. You should see the virtual environment show up as a prefix in your terminal command line once done.
1
C:\Users\roypa\Scripts\reportenv\Scripts\activate
Assuming pip is installed by default along with Python, use the following command to install required dependency requests. Should you run into any errors regarding missing dependencies later on, you can use pip to install them as well.
1
pip install requests
To check if the installation was successful, use the following command: pip list. Your output might resemble the following sample, though it will likely contain less content. Note the virtual environment prefix previously mentioned.
1
2
3
4
5
6
7
8
9
10
11
12
13
14
15
16
17
18
19
20
21
22
(reportenv) PS C:\Users\roypa\Scripts> pip list
Package                   Version
------------------------- -----------
pandas                    2.2.1
pefile                    2023.2.7
pip                       24.0
proto-plus                1.23.0
protobuf                  4.25.3
psycopg2                  2.9.9
pyasn1                    0.6.0
pyasn1_modules            0.4.0
pywin32                   306
pywin32-ctypes            0.2.2
requests                  2.31.0
requests-oauthlib         2.0.0
rsa                       4.9
setuptools                69.2.0
uritemplate               4.1.1
urllib3                   2.2.1
uvicorn                   0.29.0
websocket-client          1.7.0
xlwings                   0.31.1
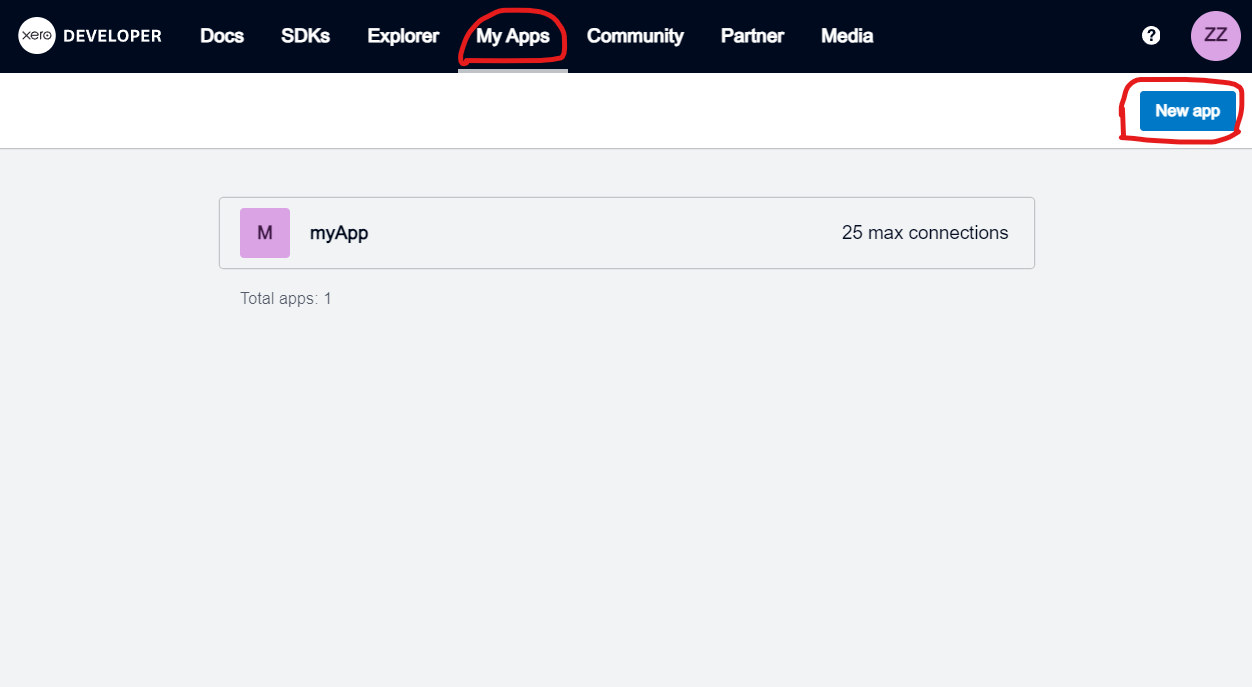
Now we will need to login to Xero Developer to setup our app in Xero. Refer the image below to create one:
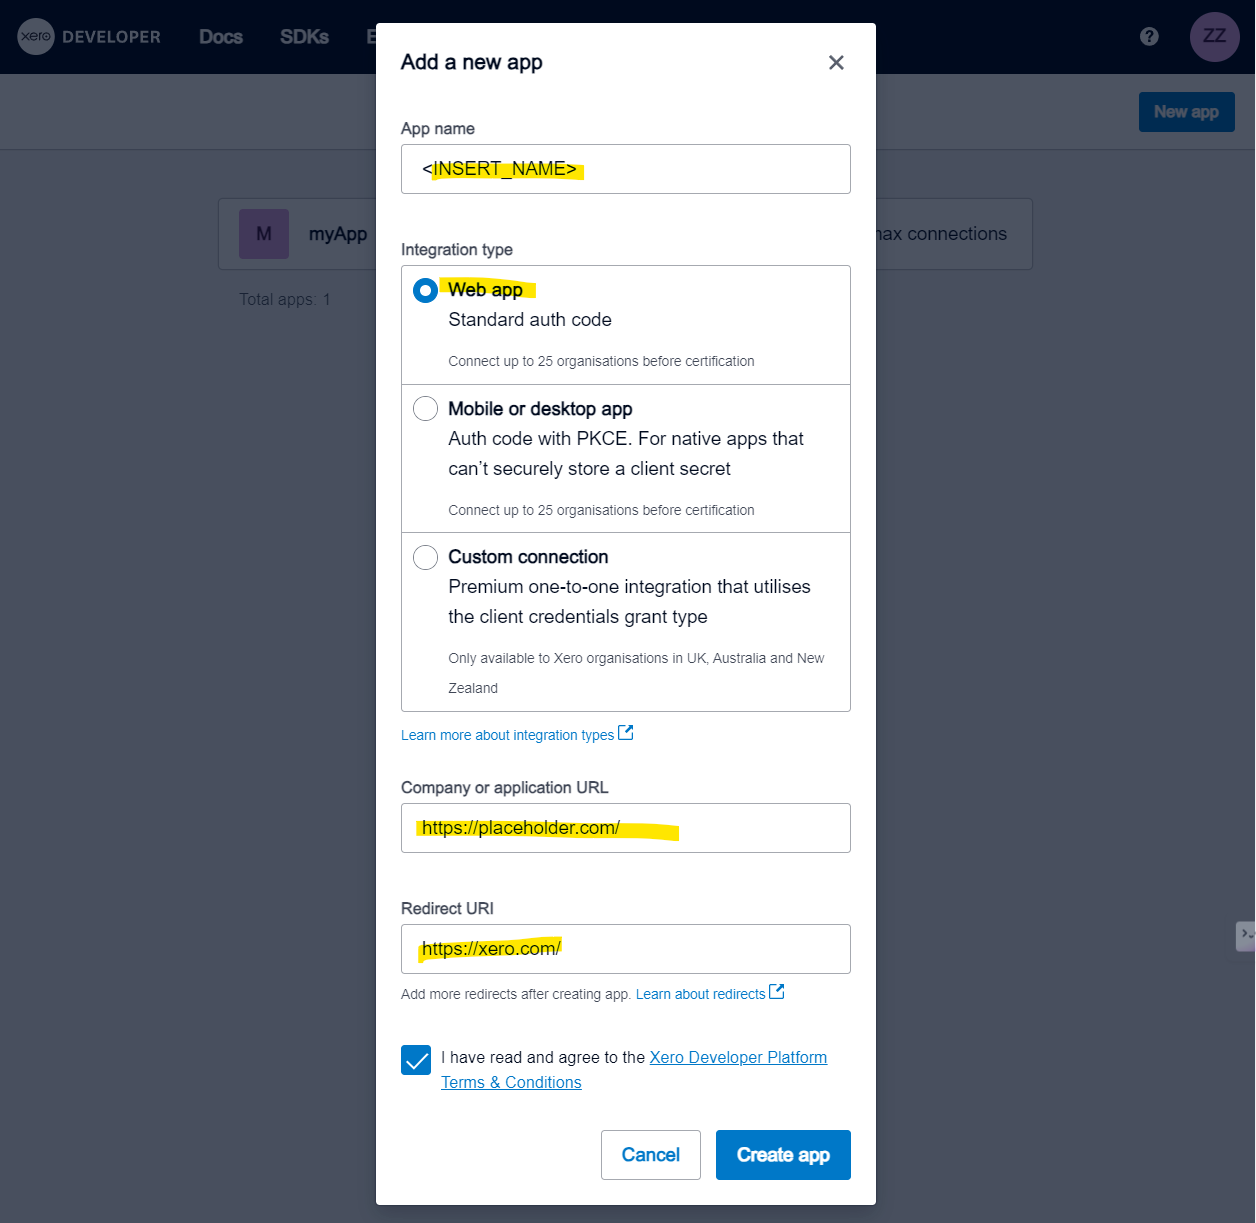
Choose any name for your app. Select “Web app” for integration type. Type “https://placeholder.com/” as the company URL. Type “https://xero.com/” as the redirect URL.
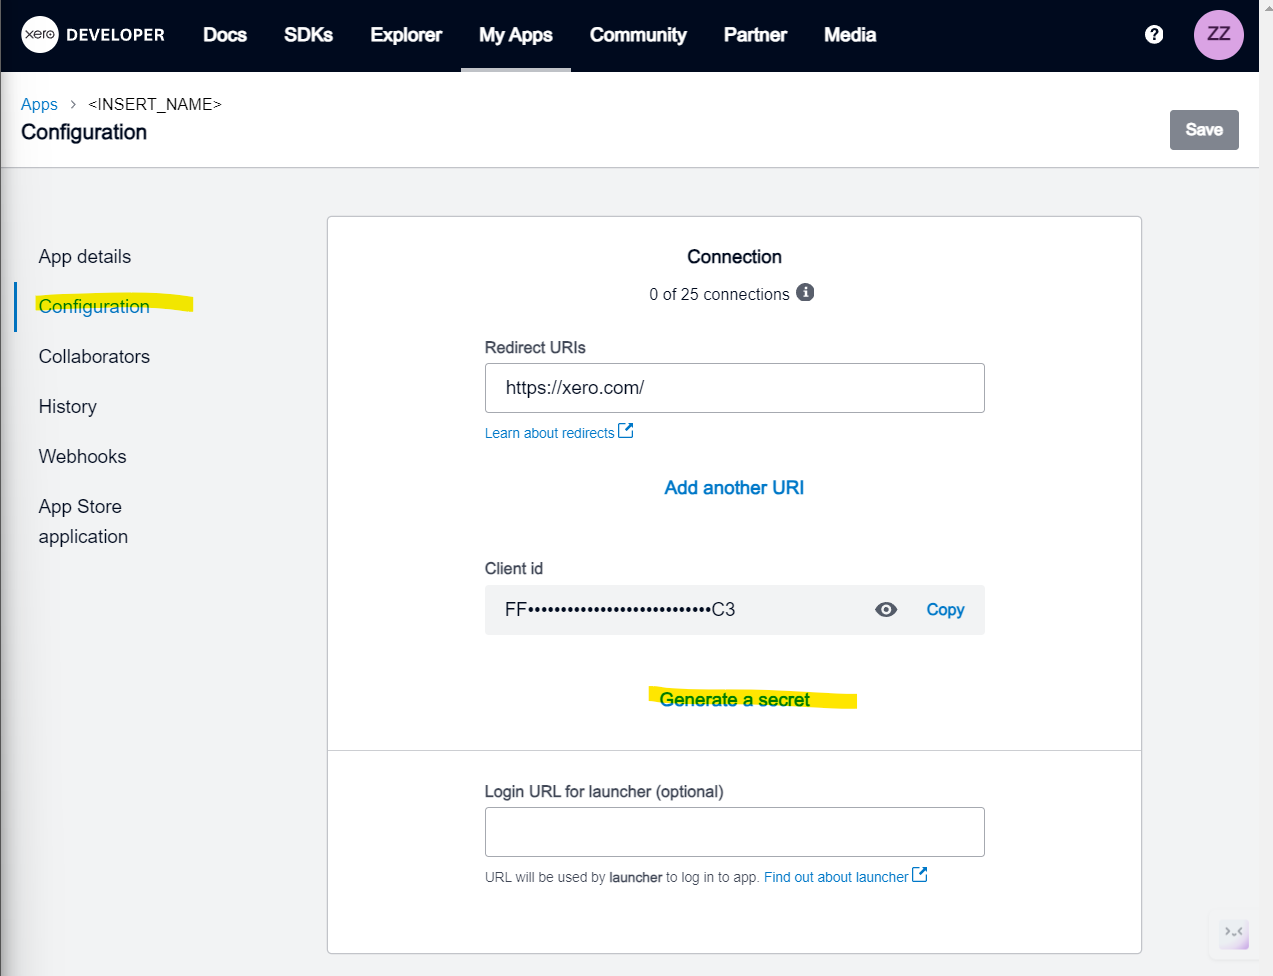
Once created, go to Configuration in the sidebar and generate a secret. Store the client ID and secret in a .txt file for later use.
With the necessary preparations completed, we can now proceed with the following Python script, which enables us to establish a long-term connection without repeated logins.
File path examples have been provided for your reference - replace them with the corresponding paths on your system.
Replace the
client_idandclient_secretvariable with those obtained in steps above.You will need to determine the scope variable based on the financial data you are interested in. In this demonstration, we will be pulling the trial balance as at 31 January 2024, which uses
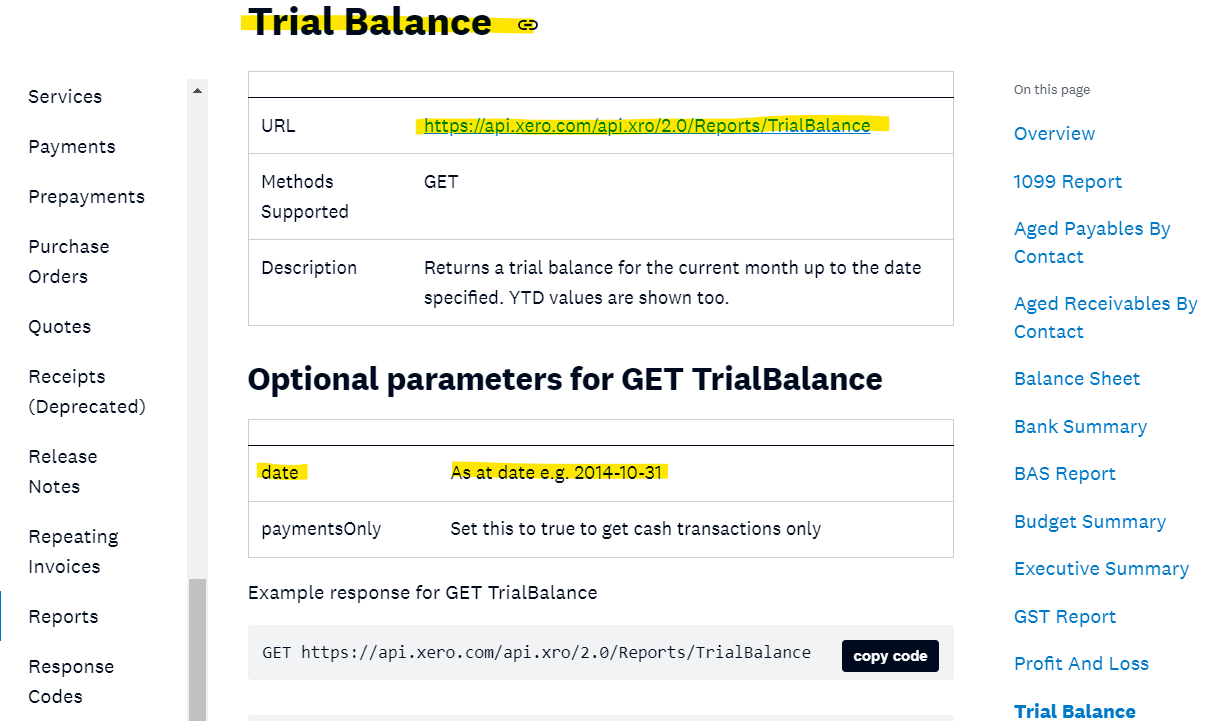
scope = 'offline_access accounting.reports.read'. Please refer to the Accounting API Reports page in Xero for other options.Within the
XeroRequestsfunction below, you will notice that there is aget_urllocal variable. Refer to the API documentation in the prior bullet point for the relevant endpoint URLs. This will determine what action will be taken and what input parameters will be for the content requested (e.g. period end date for trial balances). In this instance we will be using'https://api.xero.com/api.xro/2.0/Reports/TrialBalance?Date=2024-01-31', whereTrialBalanceis the item requested, andDate=2024-01-31is the input parameter for our report date.
1
2
3
4
5
6
7
8
9
10
11
12
13
14
15
16
17
18
19
20
21
22
23
24
25
26
27
28
29
30
31
32
33
34
35
36
37
38
39
40
41
42
43
44
45
46
47
48
49
50
51
52
53
54
55
56
57
58
59
60
61
62
63
64
65
66
67
68
69
70
71
72
73
74
75
76
77
78
79
80
81
82
83
84
85
86
87
88
89
90
91
92
93
94
95
96
97
98
99
100
101
102
103
104
105
106
107
108
109
110
111
112
113
114
115
116
import requests
import webbrowser
import base64

client_id = <INSERT_CLIENT_ID>
client_secret = <INSERT_CLIENT_SECRET>
redirect_url = 'https://www.xero.com/'
scope = 'offline_access accounting.reports.read' # Change as required.
b64_id_secret = base64.b64encode(bytes(client_id + ':' + client_secret, 'utf-8')).decode('utf-8')


def XeroFirstAuth():
    # 1. Send a user to authorize your app
    auth_url = ('''https://login.xero.com/identity/connect/authorize?''' +
                '''response_type=code''' +
                '''&client_id=''' + client_id +
                '''&redirect_uri=''' + redirect_url +
                '''&scope=''' + scope +
                '''&state=123''')
    webbrowser.open_new(auth_url)

    # 2. Users are redirected back to you with a code
    auth_res_url = input('What is the response URL? ')
    start_number = auth_res_url.find('code=') + len('code=')
    end_number = auth_res_url.find('&scope')
    auth_code = auth_res_url[start_number:end_number]
    print(auth_code)
    print('\n')

    # 3. Exchange the code
    exchange_code_url = 'https://identity.xero.com/connect/token'
    response = requests.post(exchange_code_url,
                            headers = {
                                'Authorization': 'Basic ' + b64_id_secret
                            },
                            data = {
                                'grant_type': 'authorization_code',
                                'code': auth_code,
                                'redirect_uri': redirect_url
                            })
    json_response = response.json()
    print(json_response)
    print('\n')

    # 4. Receive your tokens
    return [json_response['access_token'], json_response['refresh_token']]


# 5. Check the full set of tenants you've been authorized to access
def XeroTenants(access_token):
    connections_url = 'https://api.xero.com/connections'
    response = requests.get(connections_url,
                            headers={
                                'Authorization': 'Bearer ' + access_token,
                                'Content-Type': 'application/json'
                            })
    json_response = response.json()
    print(json_response)

    for tenants in json_response:
        json_dict = tenants
    return json_dict['tenantId']


# 6.1 Refreshing access tokens
def XeroRefreshToken(refresh_token):
    token_refresh_url = 'https://identity.xero.com/connect/token'
    response = requests.post(token_refresh_url,
                             headers={
                                 'Authorization': 'Basic ' + b64_id_secret,
                                 'Content-Type': 'application/x-www-form-urlencoded'
                             },
                             data={
                                 'grant_type': 'refresh_token',
                                 'refresh_token': refresh_token
                             })
    json_response = response.json()
    print(json_response)

    new_refresh_token = json_response['refresh_token']
    rt_file = open('C:/Users/roypa/Downloads/refresh_token.txt', 'w')
    rt_file.write(new_refresh_token)
    rt_file.close()

    return [json_response['access_token'], json_response['refresh_token']]


# 6.2 Call the API
def XeroRequests():
    old_refresh_token = open('C:/Users/roypa/Downloads/refresh_token.txt', 'r').read()
    new_tokens = XeroRefreshToken(old_refresh_token)
    xero_tenant_id = XeroTenants(new_tokens[0])

    get_url = 'https://api.xero.com/api.xro/2.0/Reports/TrialBalance?Date=2024-01-31'
    response = requests.get(get_url,
                            # params={
                            #     "offset": "481"
                            # },
                            headers={
                                'Authorization': 'Bearer ' + new_tokens[0],
                                'Xero-tenant-id': xero_tenant_id,
                                'Accept': 'application/json'
                            })
    json_response = response.json()
    print(json_response)

    xero_output = open('C:/Users/roypa/Downloads/xero_output.json', 'w')
    xero_output.write(response.text)
    xero_output.close()


old_tokens = XeroFirstAuth()
XeroRefreshToken(old_tokens[1])


# XeroRequests()
 API details
After populating the variables above and running the script (e.g. via PowerShell), you will be directed to a login page for end-user authorization. Login with your Xero account and select the reporting company under concern to obtain access.
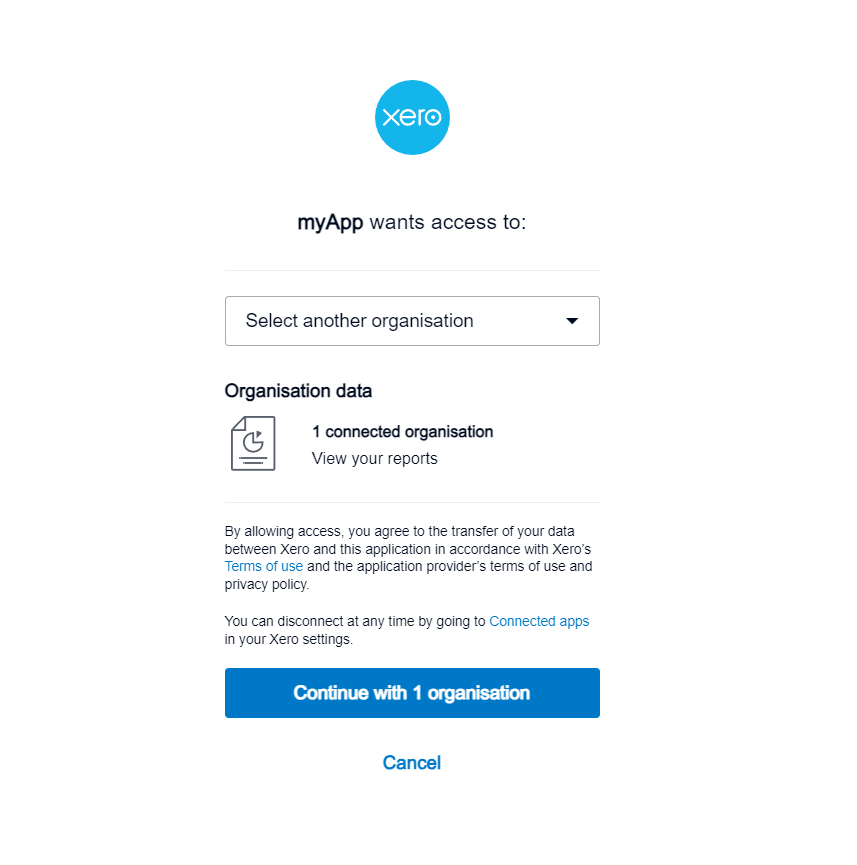 Authorization
Once logged in, copy the response page URL back into the Python terminal and press Enter to obtain a refreshable access token under the designated folder.
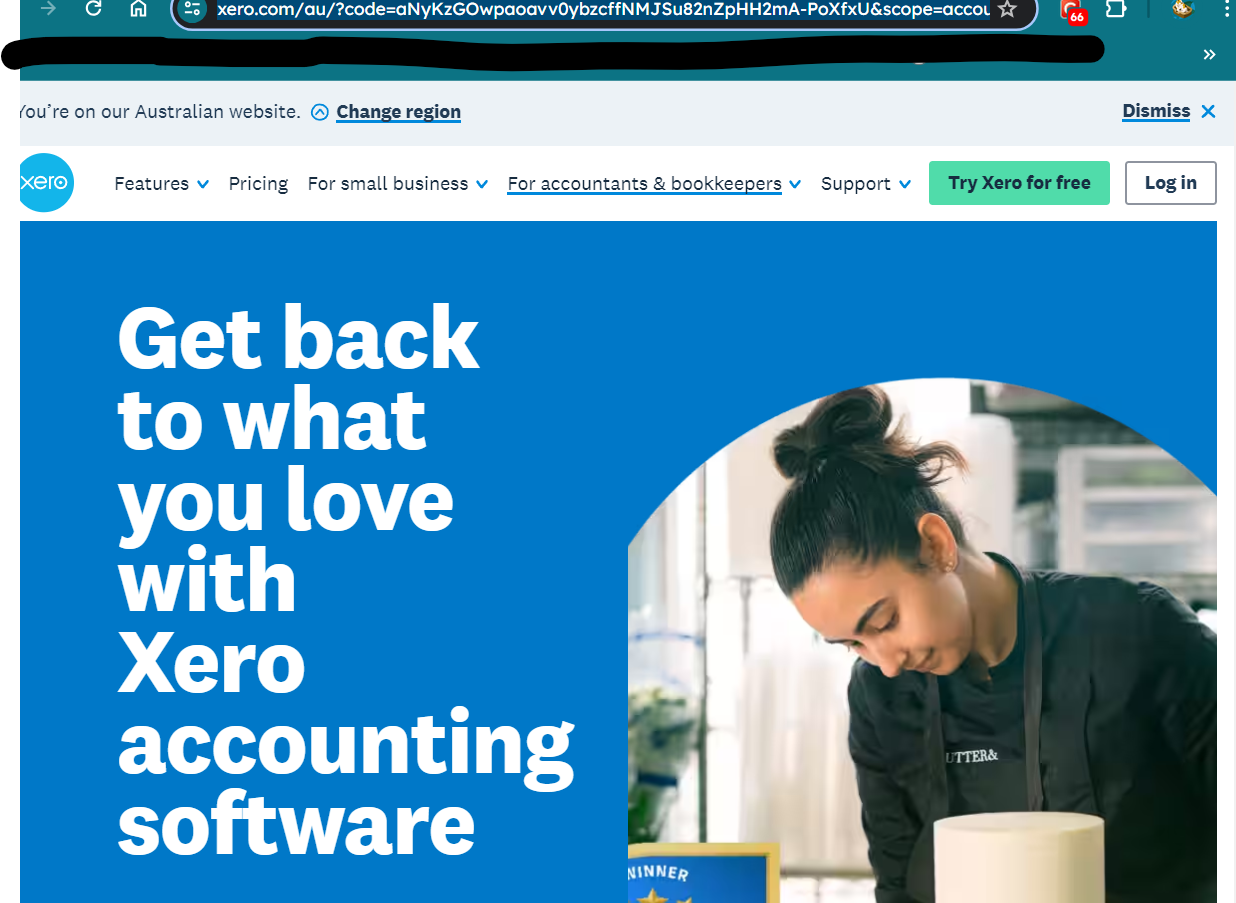 Authorization link
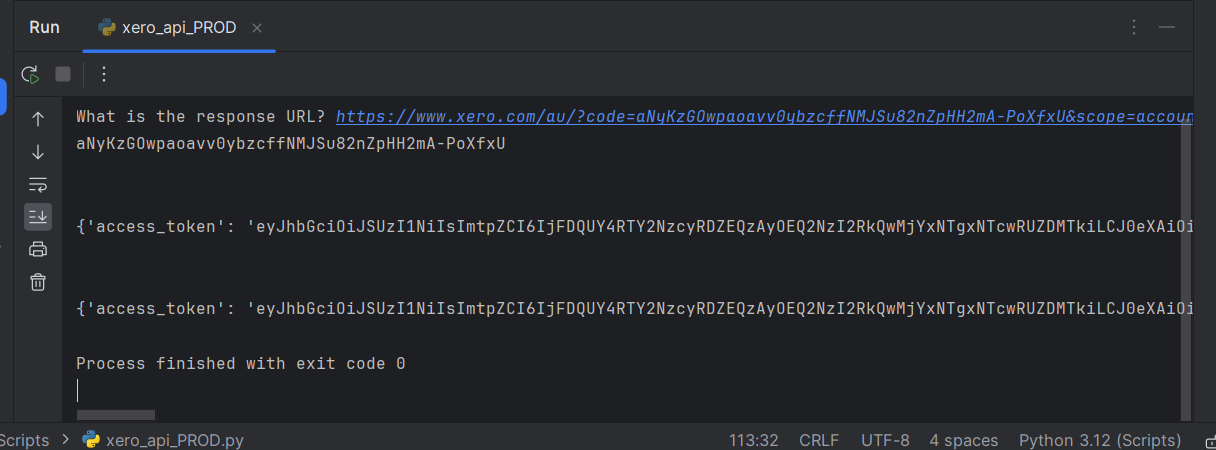 Access token
 Token .txt file
Access tokens typically have a limited lifespan of about 10 minutes, similar to automatic logouts due to inactivity. However, in the provided script, the XeroRequests function at the very bottom automatically refreshes the token each time an API call is made, ensuring long-term access.
To proceed, uncomment the XeroRequests() call at the bottom of the script and comment out the XeroFirstAuth() and XeroRefreshToken(old_tokens[1]) lines above. These two functions only need to be run once during the initial setup phase to obtain the access token. Going forward, only XeroRequests() will be necessary. Once the changes are made, rerun the script to make the API call. You should receive a JSON file containing the data at the designated path, in this case, the trial balance as of 31 January 2024.

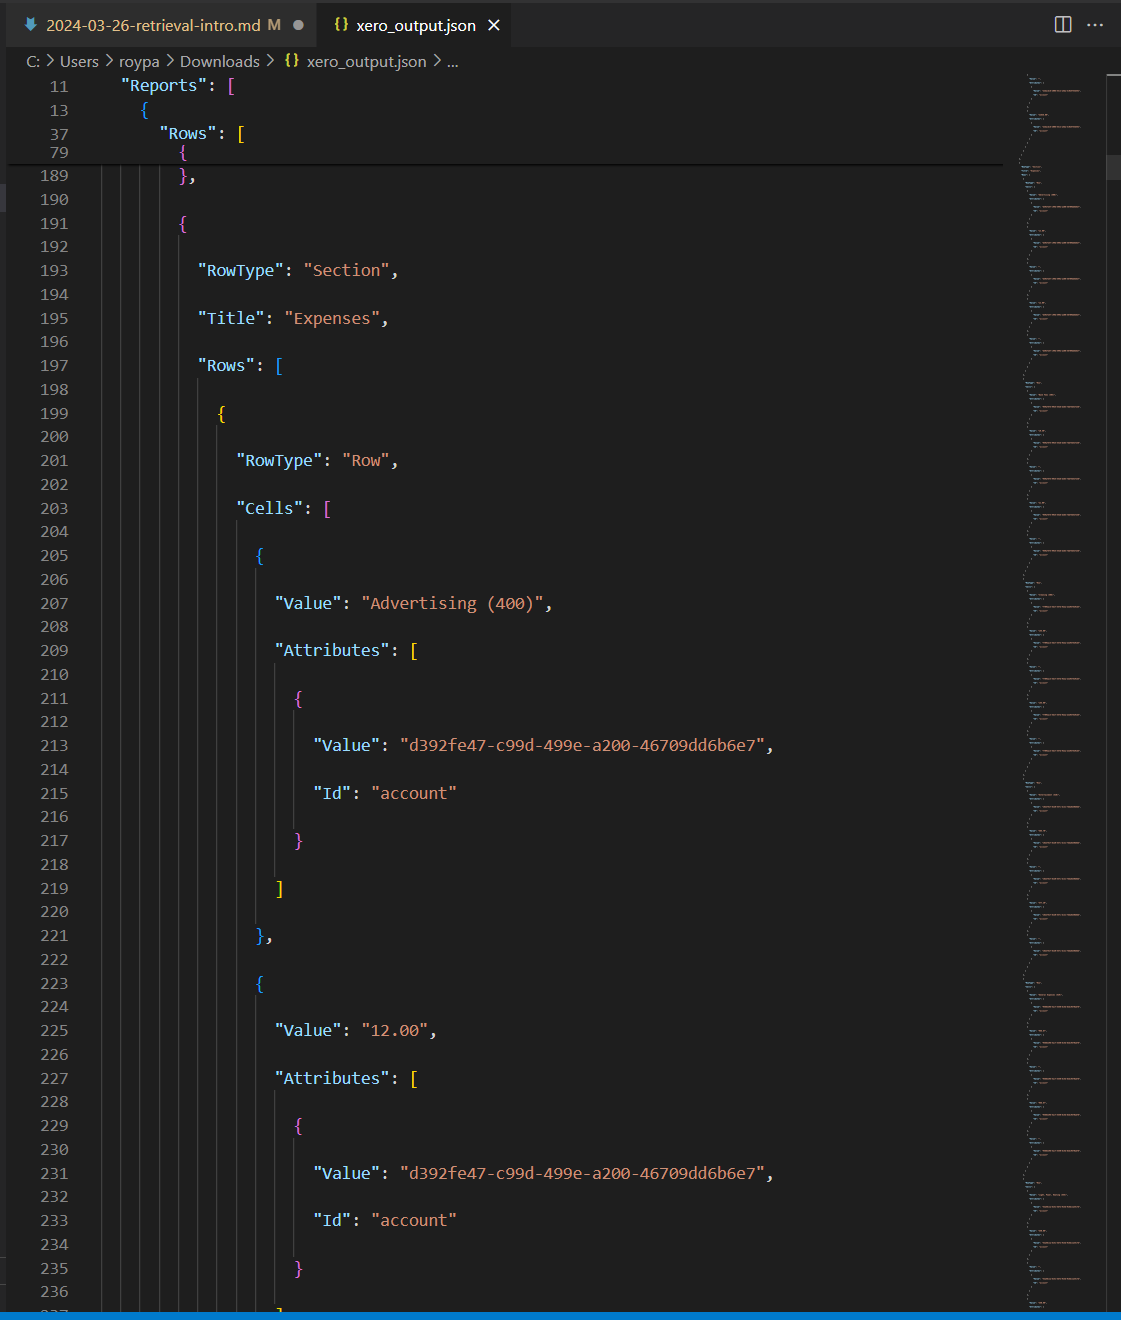 Sample output
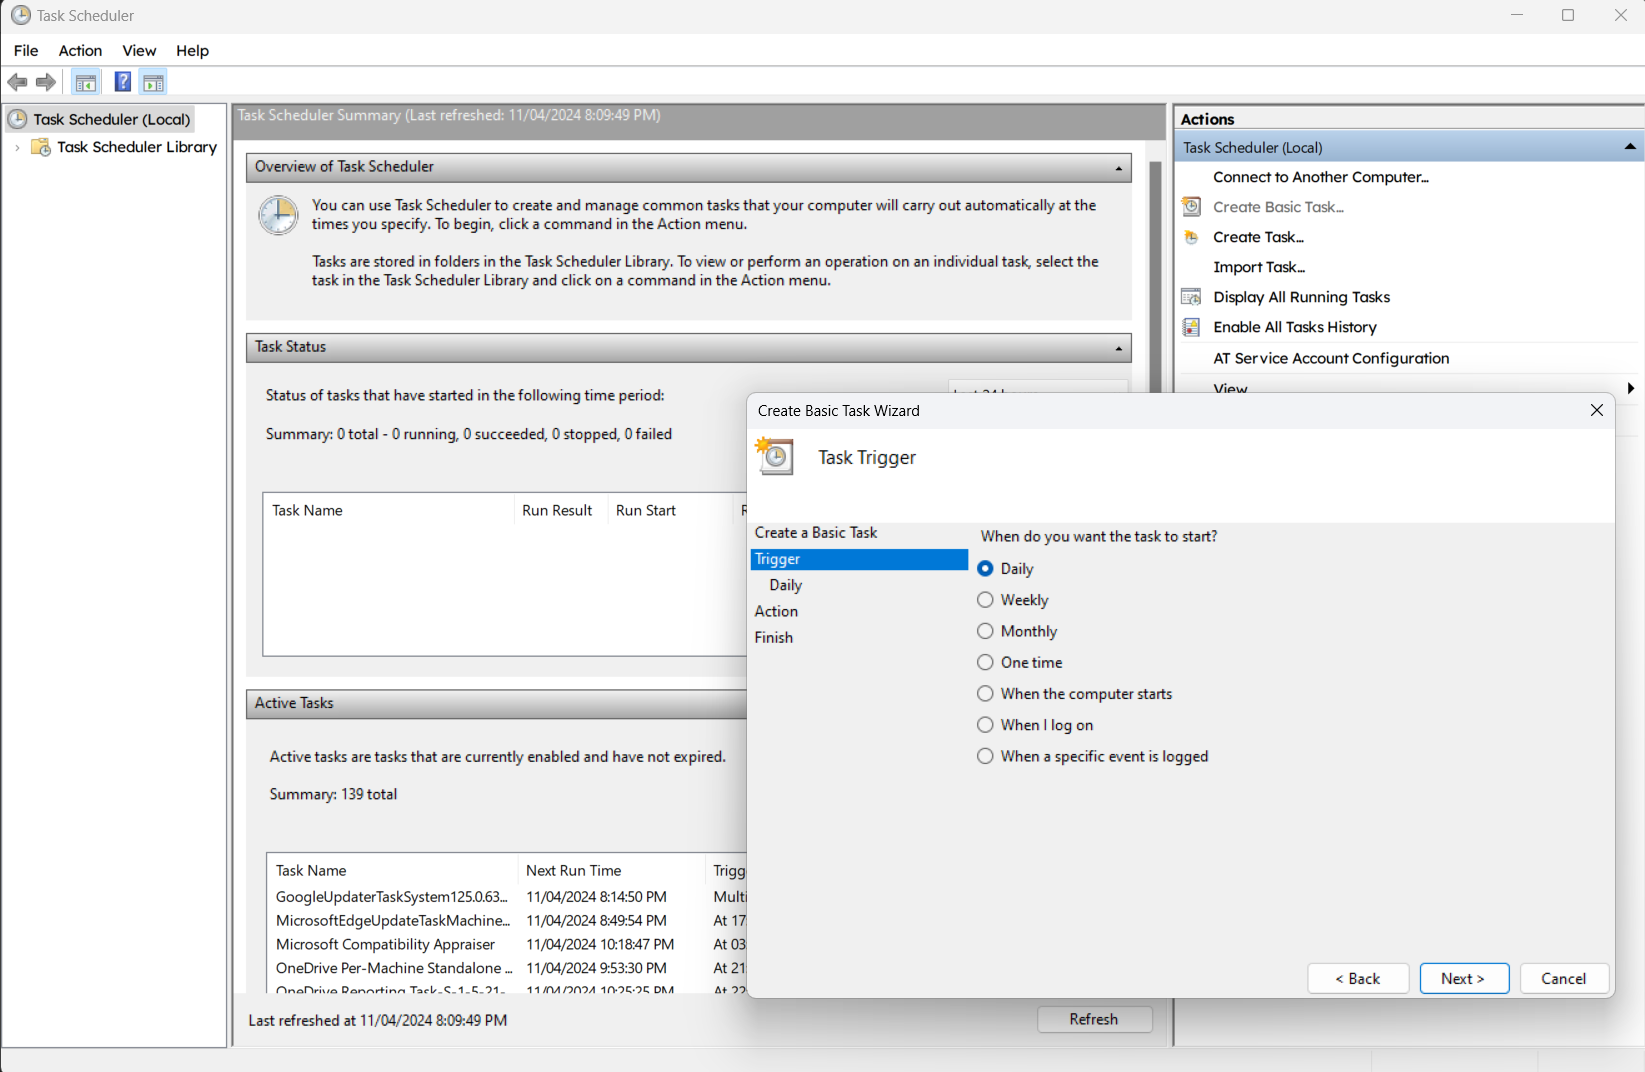
This script can now be manually run on-demand, or alternatively you can use Windows Task Scheduler to schedule the script at certain intervals - this will be covered in future walkthroughs.
Outcome
We’ve successfully automated the inflow of JSON data, which serves as our starting point for further optimization and automation. The next step involves converting the received JSON files into a tabular format, such as CSV files, for easier data interpretation and transformation into actionable insights. For the next walkthrough on JSON to CSV conversion, refer to this link.